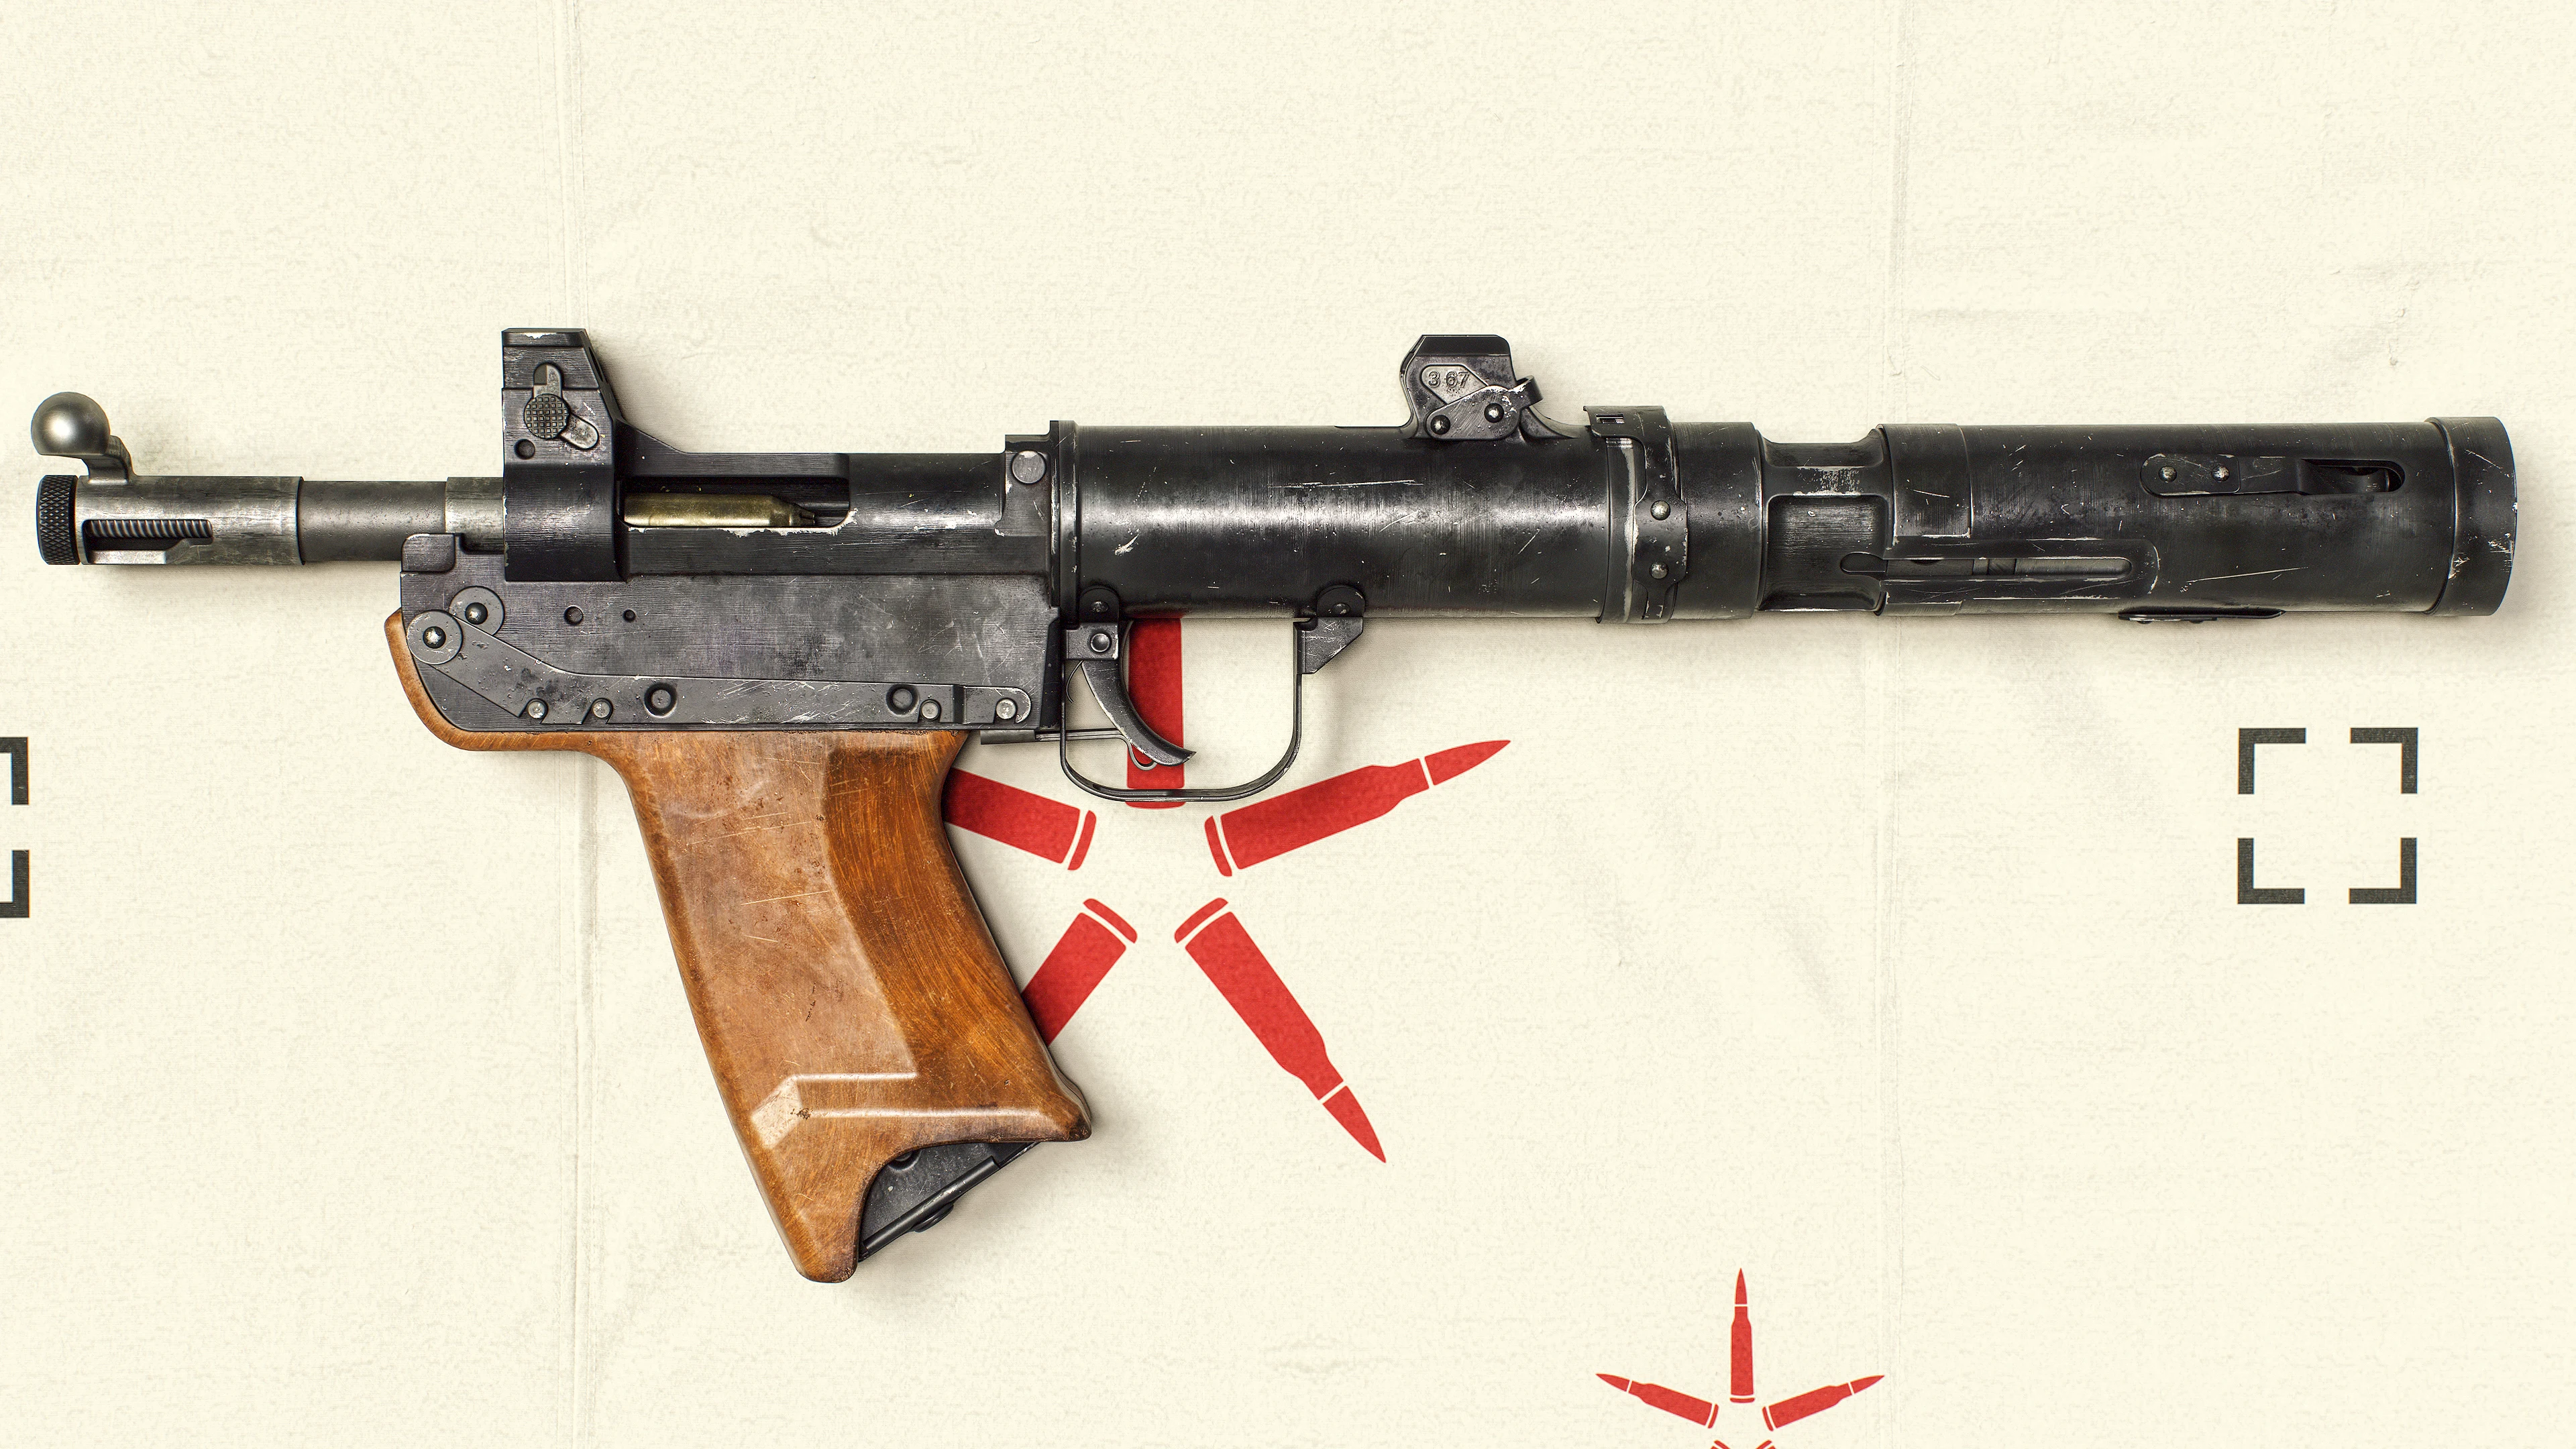
Breakdown on the BS-1 TISHINA
I will be talking about the Weapon Room Challenge #28 that I participated in. The task was to model and texture the BS-1 TISHINA a soviet era grenade launcher designed for saboteur and espionage during the cold war.
Introduction
Hi everyone, I’m Tyler, a freelance hard surface and environment artist. I took part in The Weapon Room Challenge #28, where the task was to model and texture the BS-1 Tishina grenade launcher - a 1k map for the bullet, a 2k map for the magazine, and a 4k map for the gun itself. This was a complex model, and I picked up a lot along the way. Those techniques are a big part of why I ended up taking first place, so I’m going to share them here.
Reference
The first thing you should ever do - before you even boot up your modelling software - is gather reference. A main reference was provided for the challenge by the host, Cohen Brawley. But the most important thing to establish while gathering reference is 100% certainty that the weapon you’re looking at is the weapon you’re modelling, and not some other variant, prototype, or airsoft version of it.
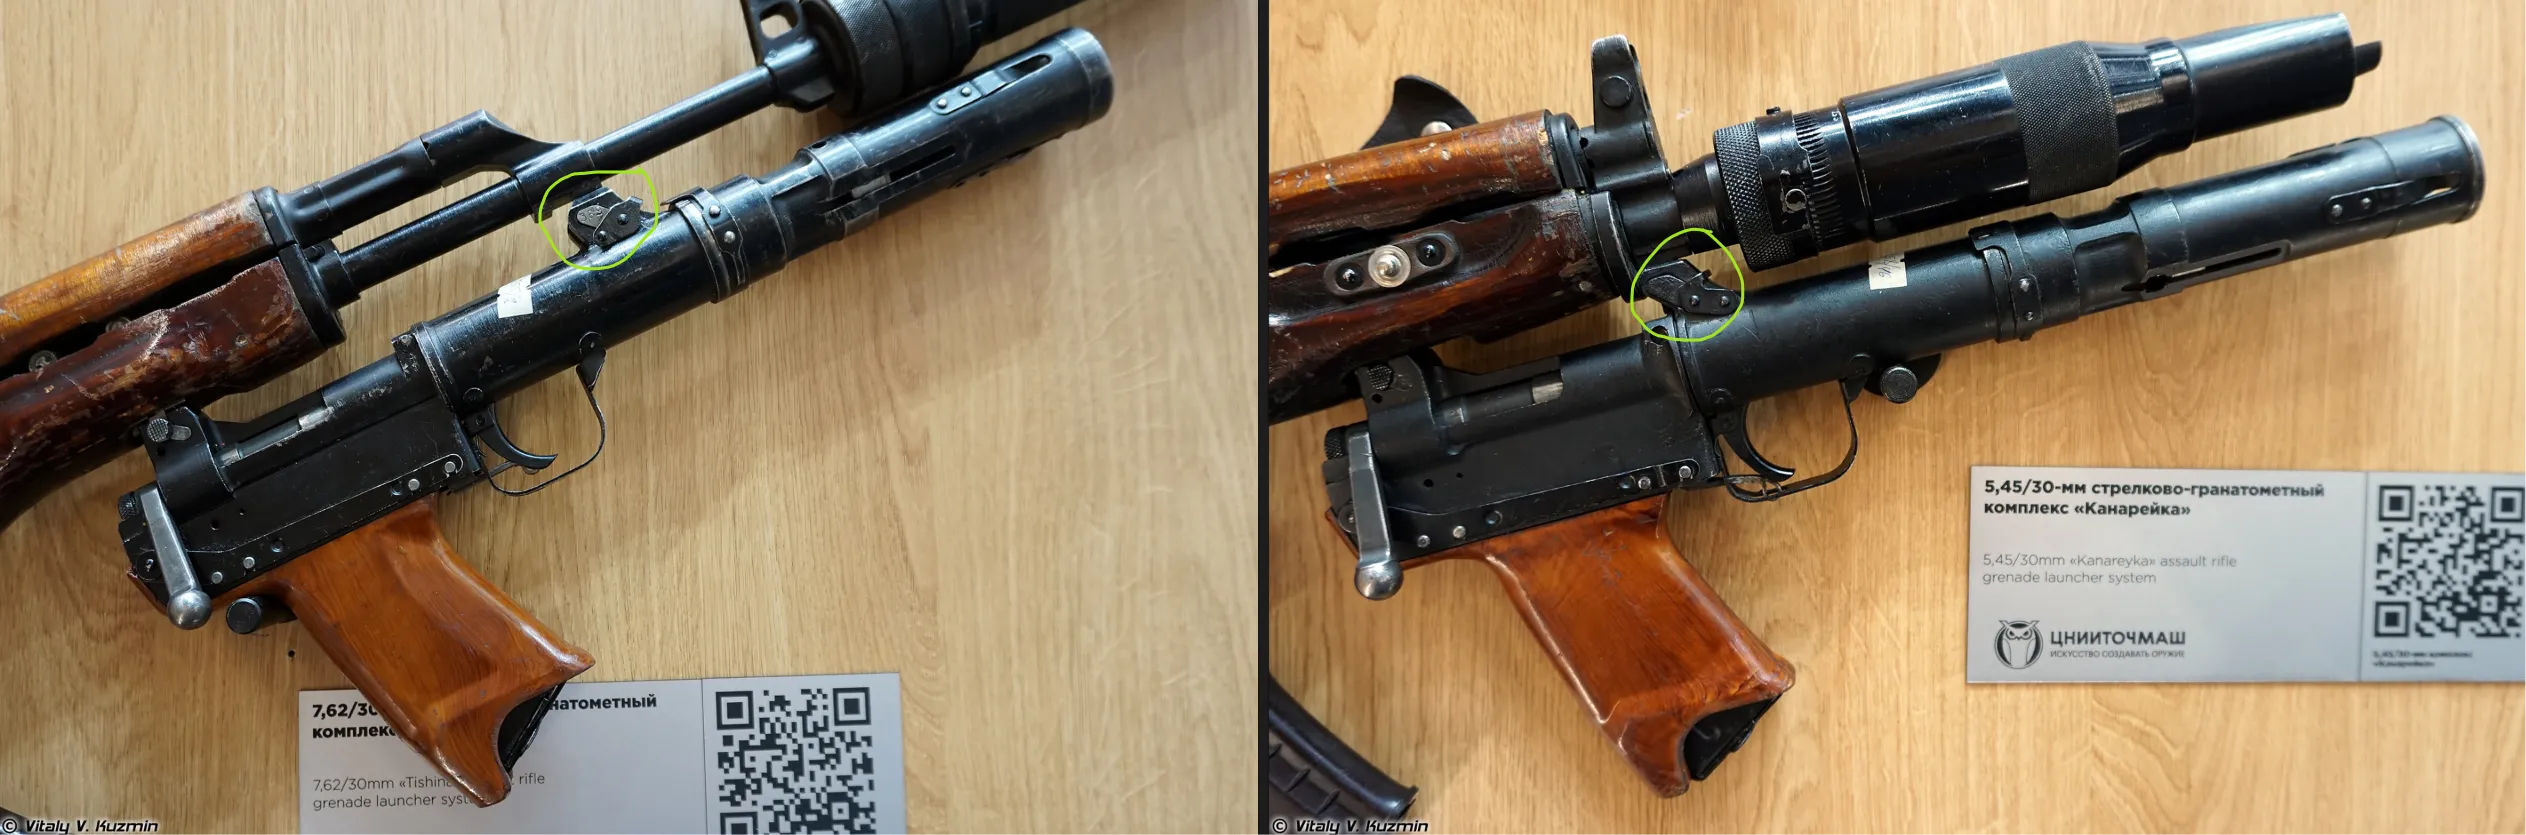
At first glance these two underbarrel grenade launchers look like the same thing. Pay attention to the area I circled, though. This is where the launcher interfaces with the AK platform’s bayonet lug to attach to the rifle, and the spacing is different between the two: the Tishina is for rifle-length AK platforms while the Canary is for compact carbine barrel lengths.
Look closer and you’ll also notice subtle differences in how each weapon was manufactured and what it’s made of. The Tishina appears to be glossier stamped metal, while the Canary looks like a more matte forged metal. These are important things to note if you want 1:1 accuracy, and catching them early prevents inconsistencies from creeping in later.
The main takeaway from reference gathering: make absolutely sure you’re modelling the correct item and not an airsoft version or model variant.
Modeling
I typically model in Plasticity for the entire piece, then fall back to Blender for simpler objects like bolts, screws, and rivets. Blender gives me greater control over the geometry compared to a CAD export, and I get clean topology out of the box on objects that will be instanced many times.
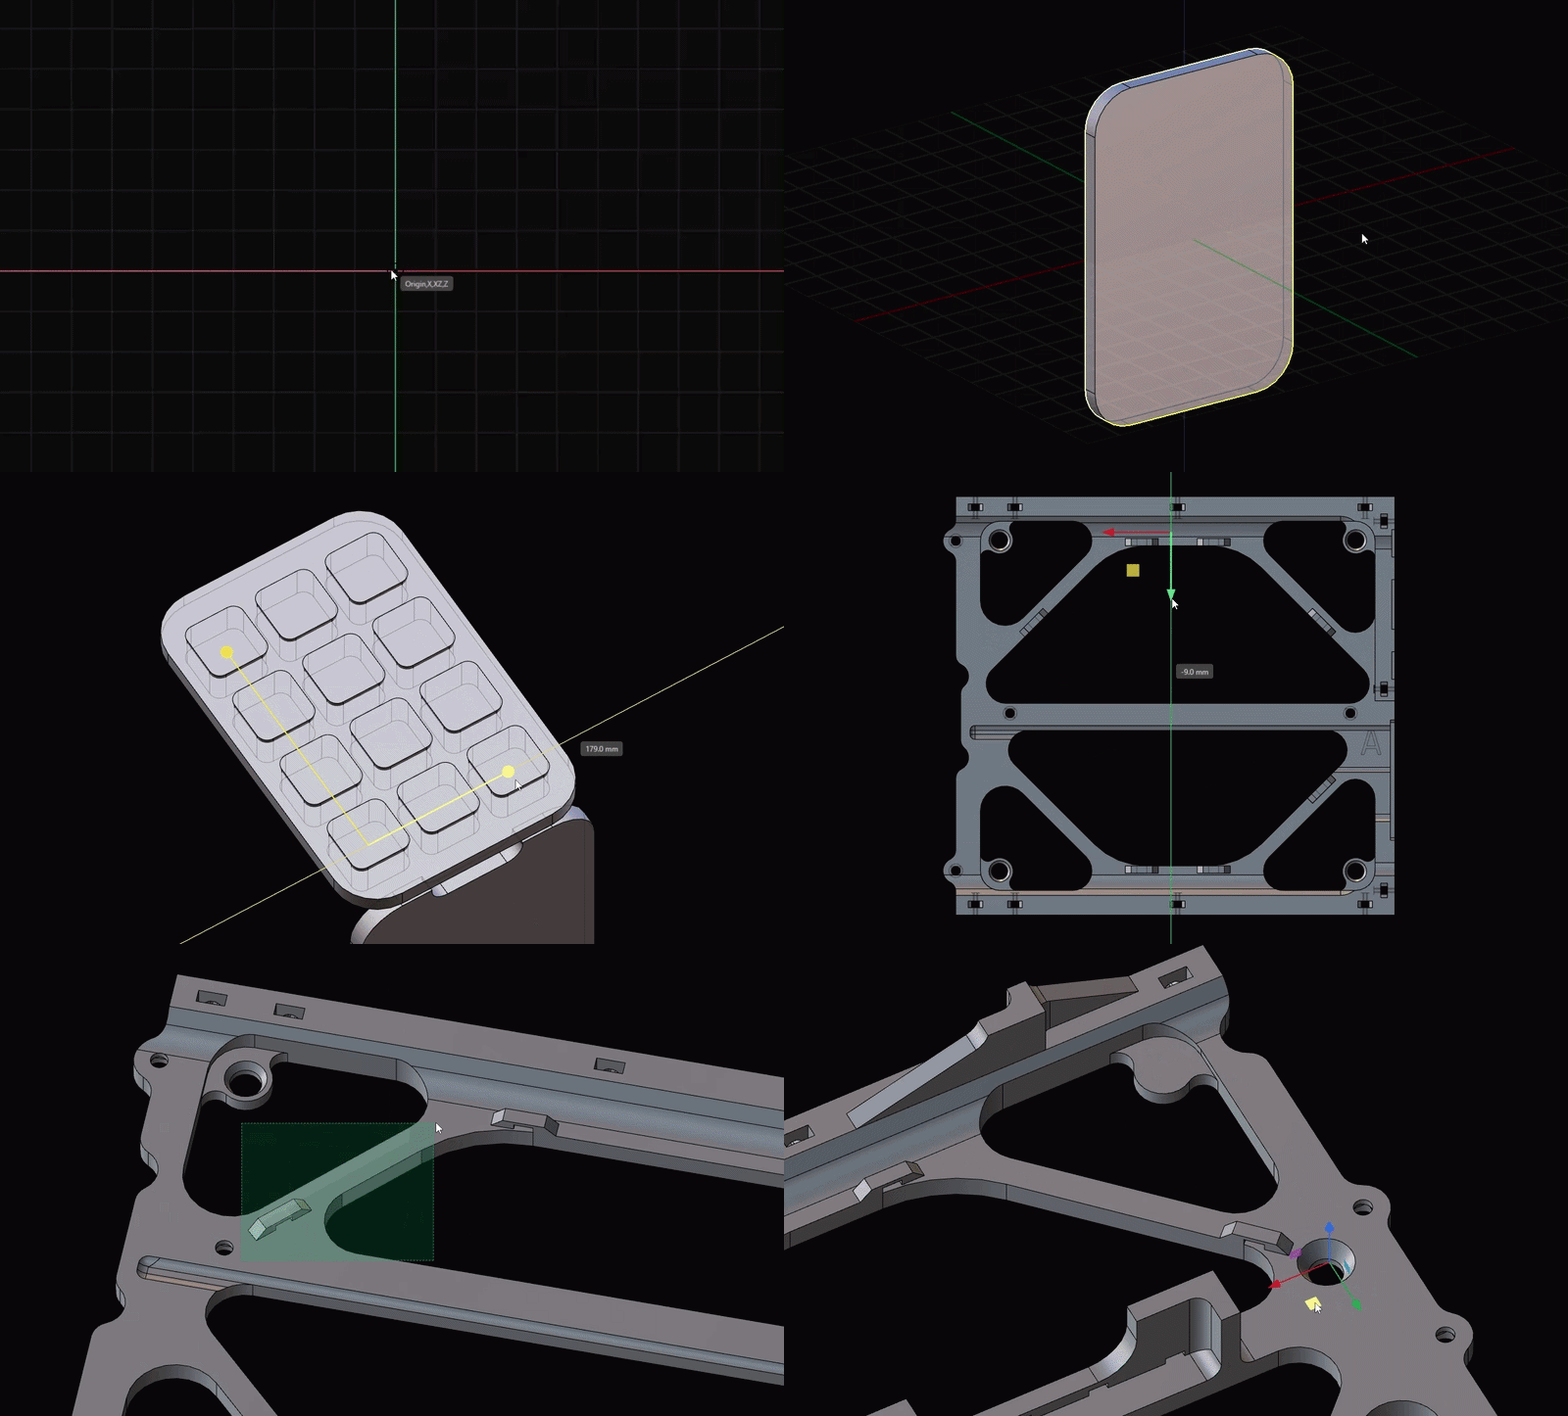
Plasticity is a great tool for hard surface work. It lets you spend most of your time actually shaping the gun instead of worrying about topology. The CAD workflow means you can iterate freely without planning topology ahead of time or fighting shading artifacts as you go.
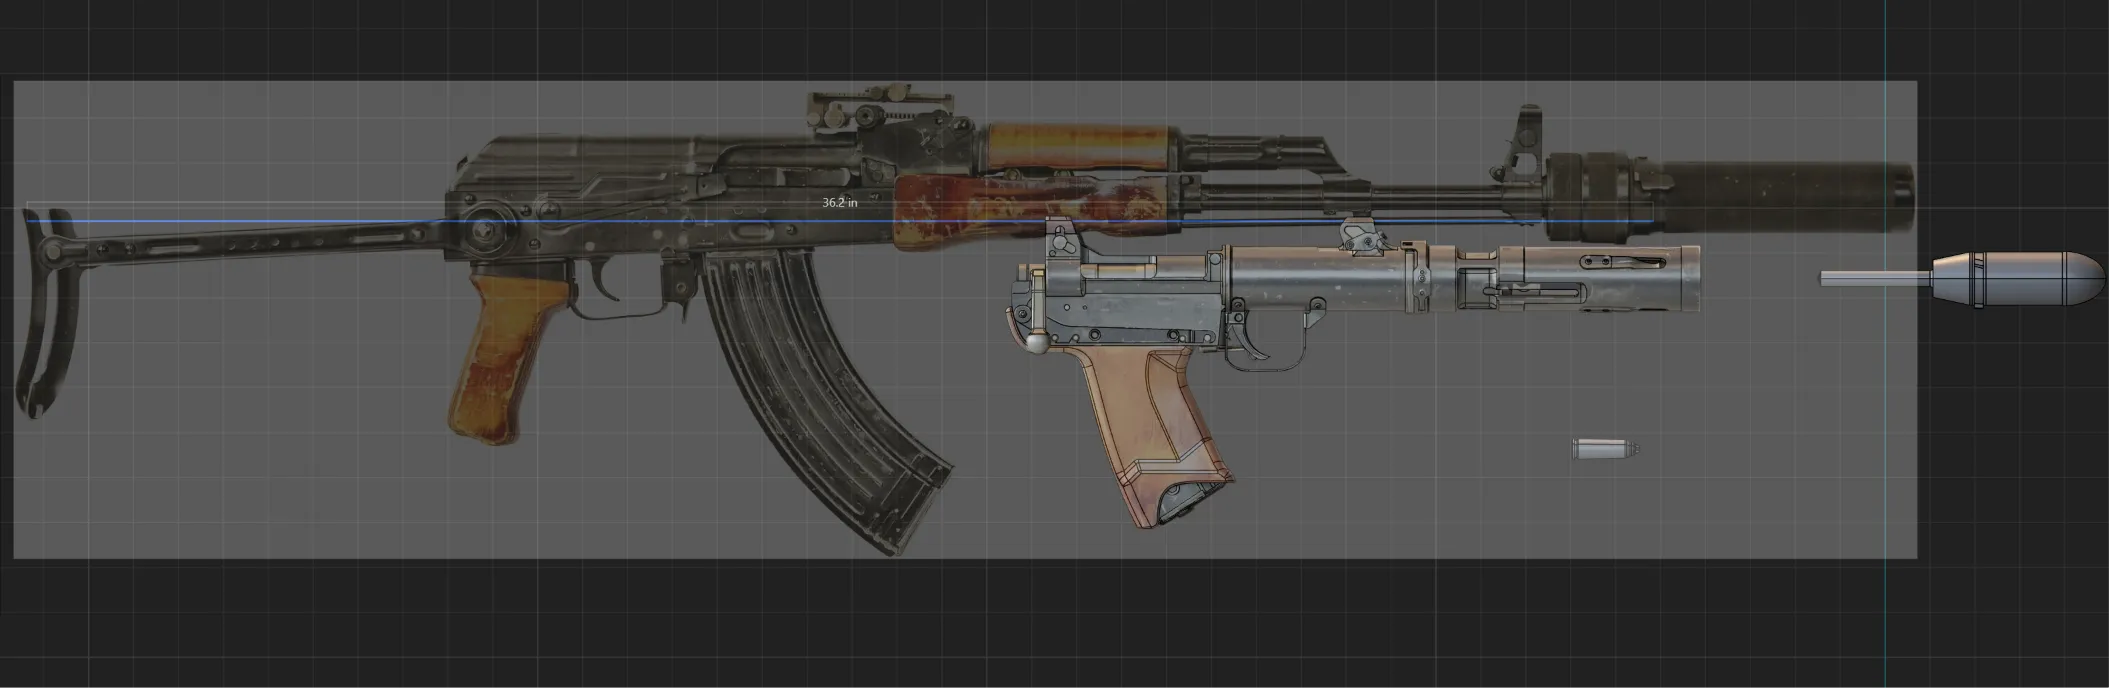
The first thing to establish is scale. Getting this right now is integral to maintaining accurate proportions and preventing inconsistencies later, like parts of the model ending up too long or too big. The BS-1 is most often seen mounted to an AK variant called the AKMS (underfolding stock, 7.62 caliber AK). The AKMS has a total length of 36.2 inches from the butt of the stock to the tip of the muzzle. Scale your reference image up to fit that length, and as long as you trace the silhouette from the background image, your grenade launcher should come out roughly matching the real BS-1.
Another way to get close on scale is to build the weapon around the real-world dimensions of the cartridge it uses - in this case, 7.62x39. Most firearms have their barrel length listed online, and since most barrels are cylinders, you only need height and length. Start with the barrel length, scale the image up until the weapon matches it, then take the height directly off the reference.
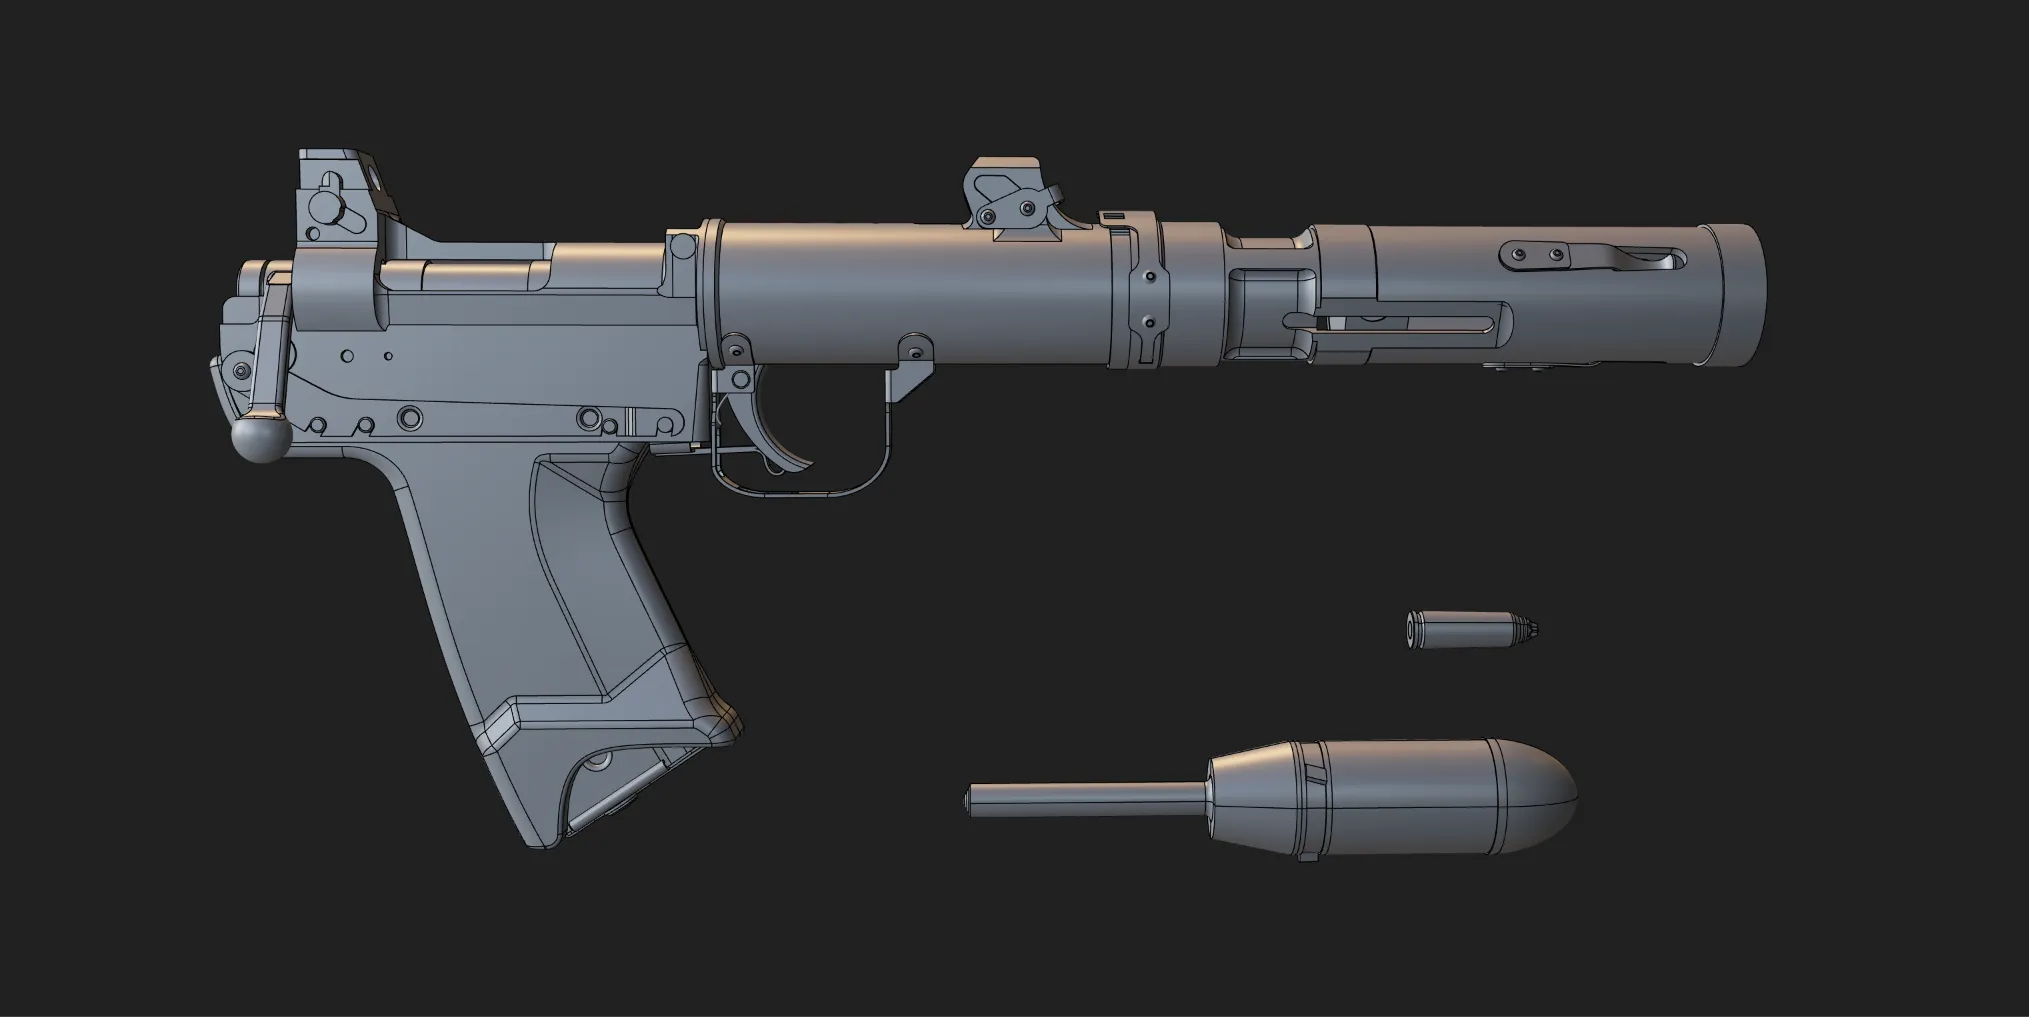
Exporting CAD Data and Converting to a Low Poly
Now that the model is finished, it’s time to export the CAD data into usable geometry. There are around four programs I know of that artists use for CAD export: Plasticity, MoI3D, PiXYZ, and Unreal Engine.
We’ll be using PiXYZ, as I find it has the best and cleanest tessellation and decimation algorithms. Export the CAD data as a .STEP file.
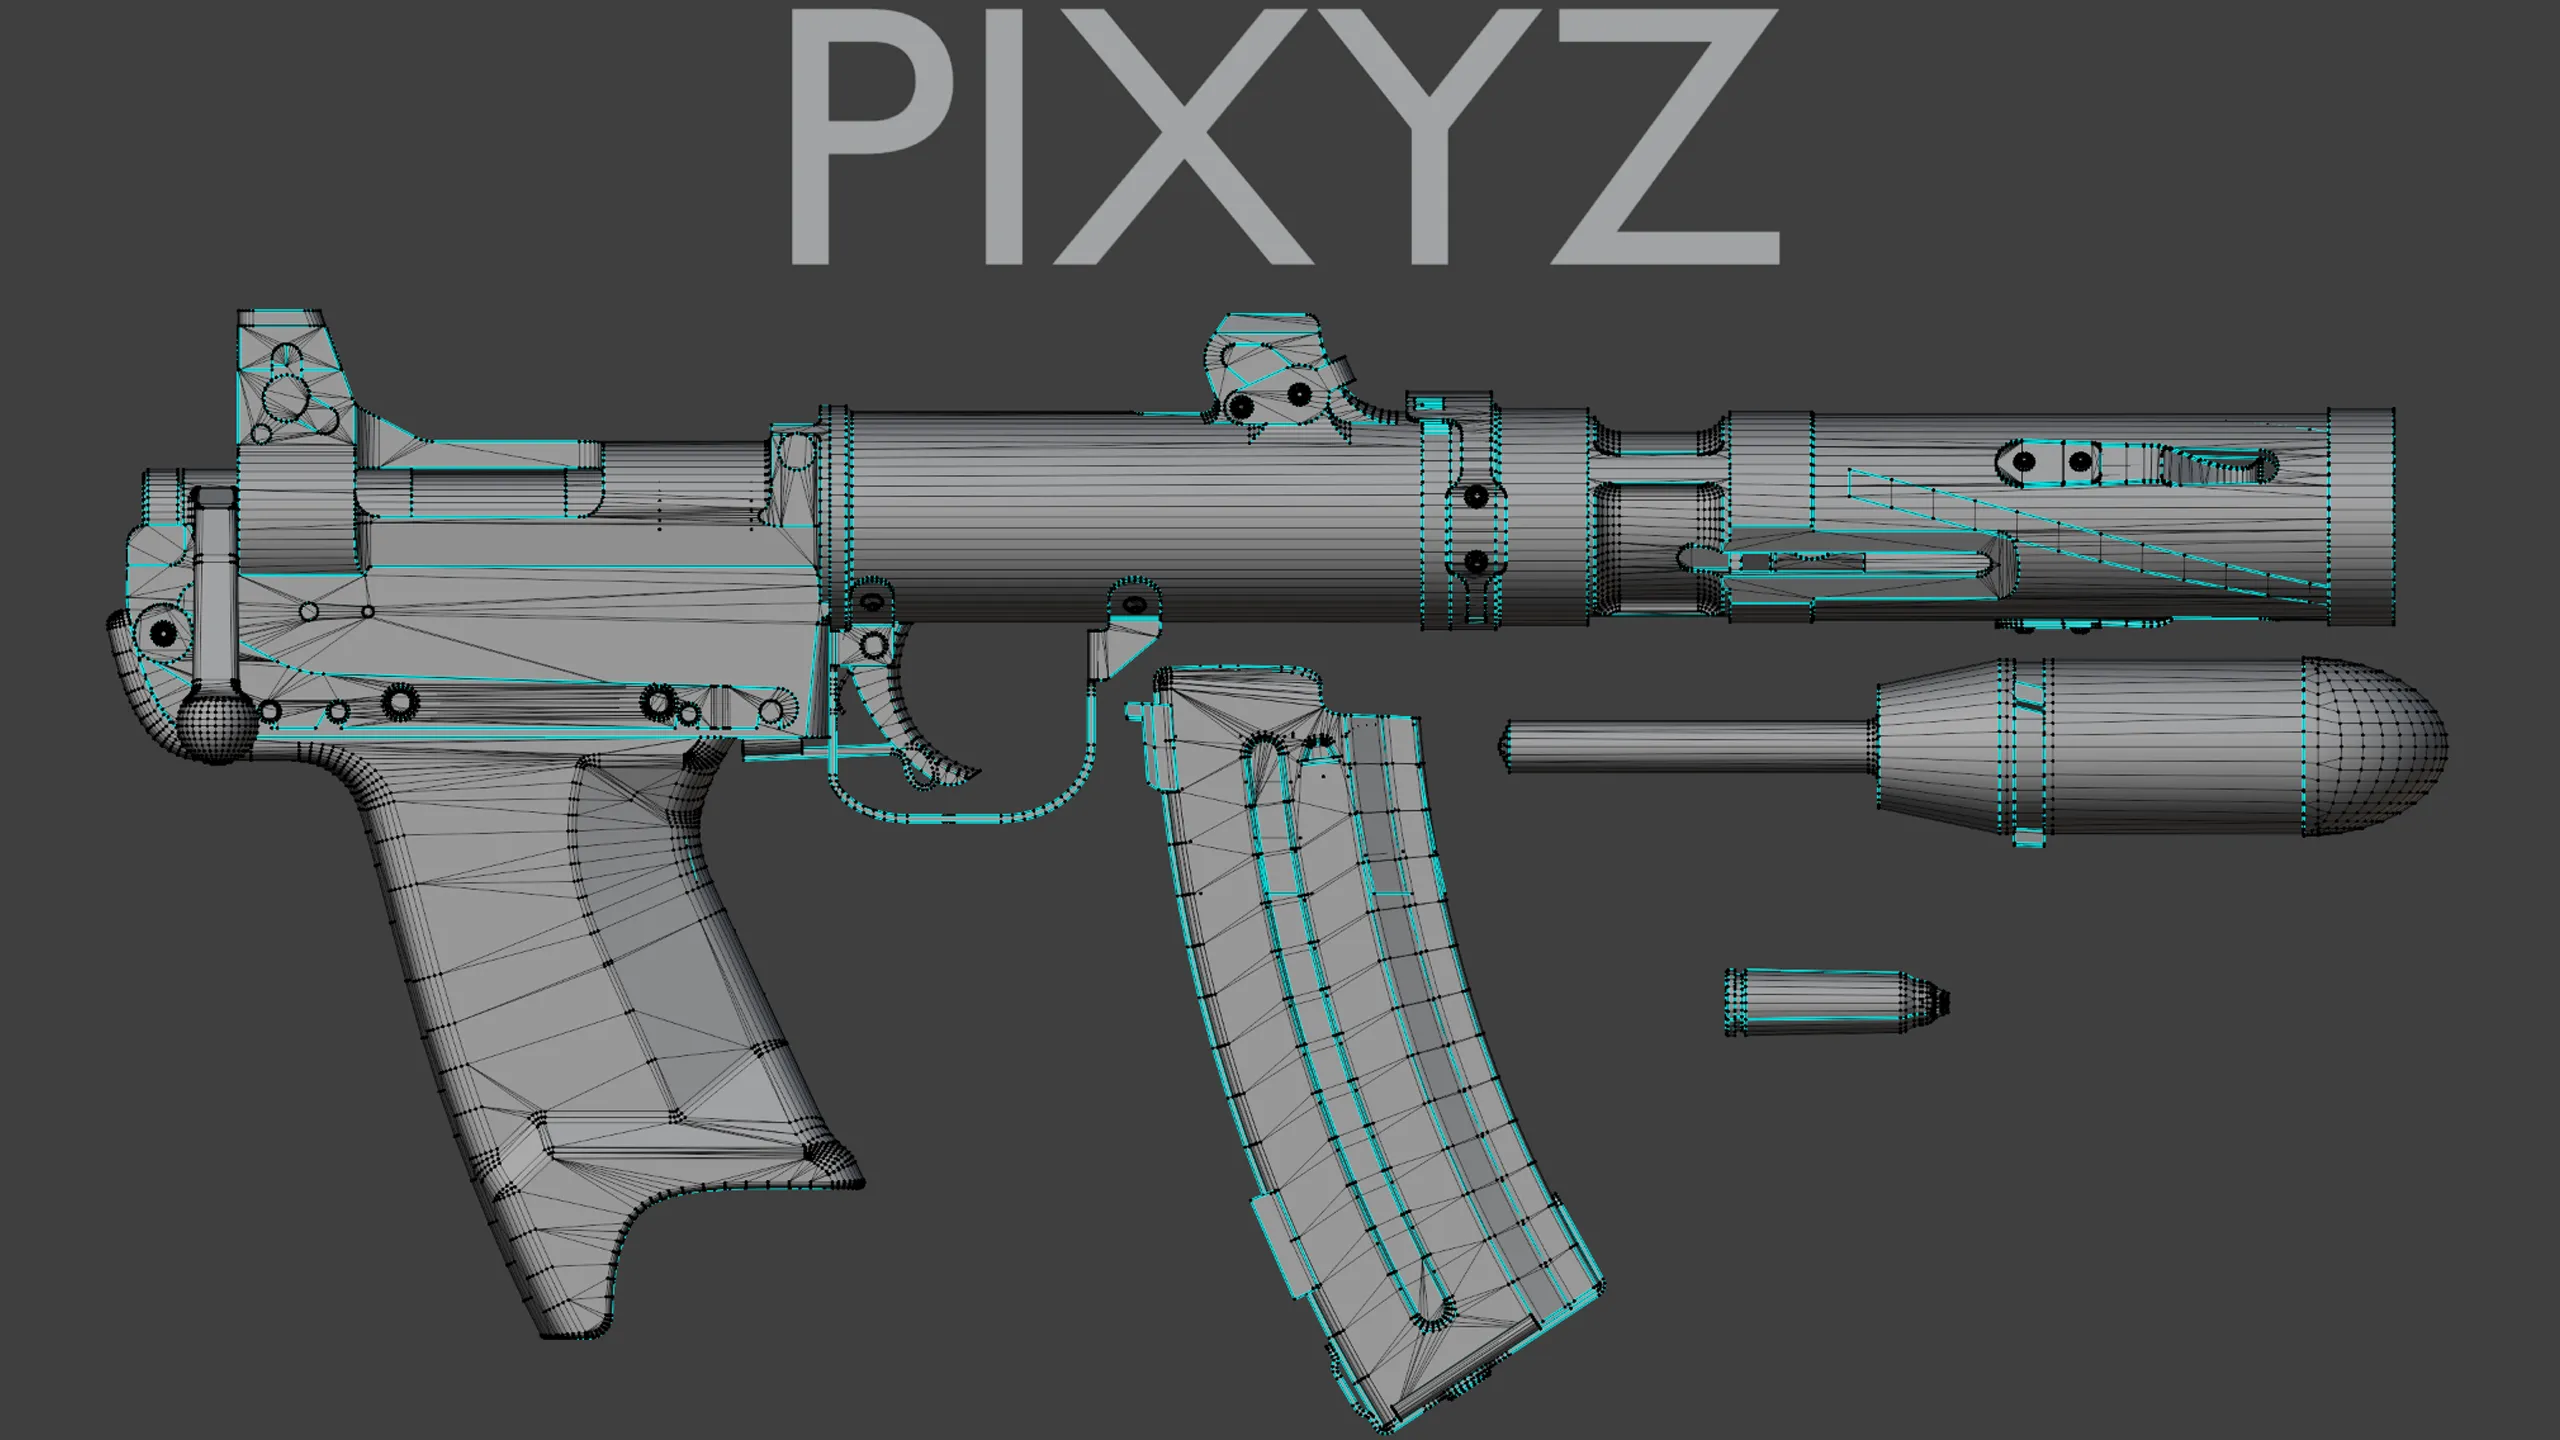
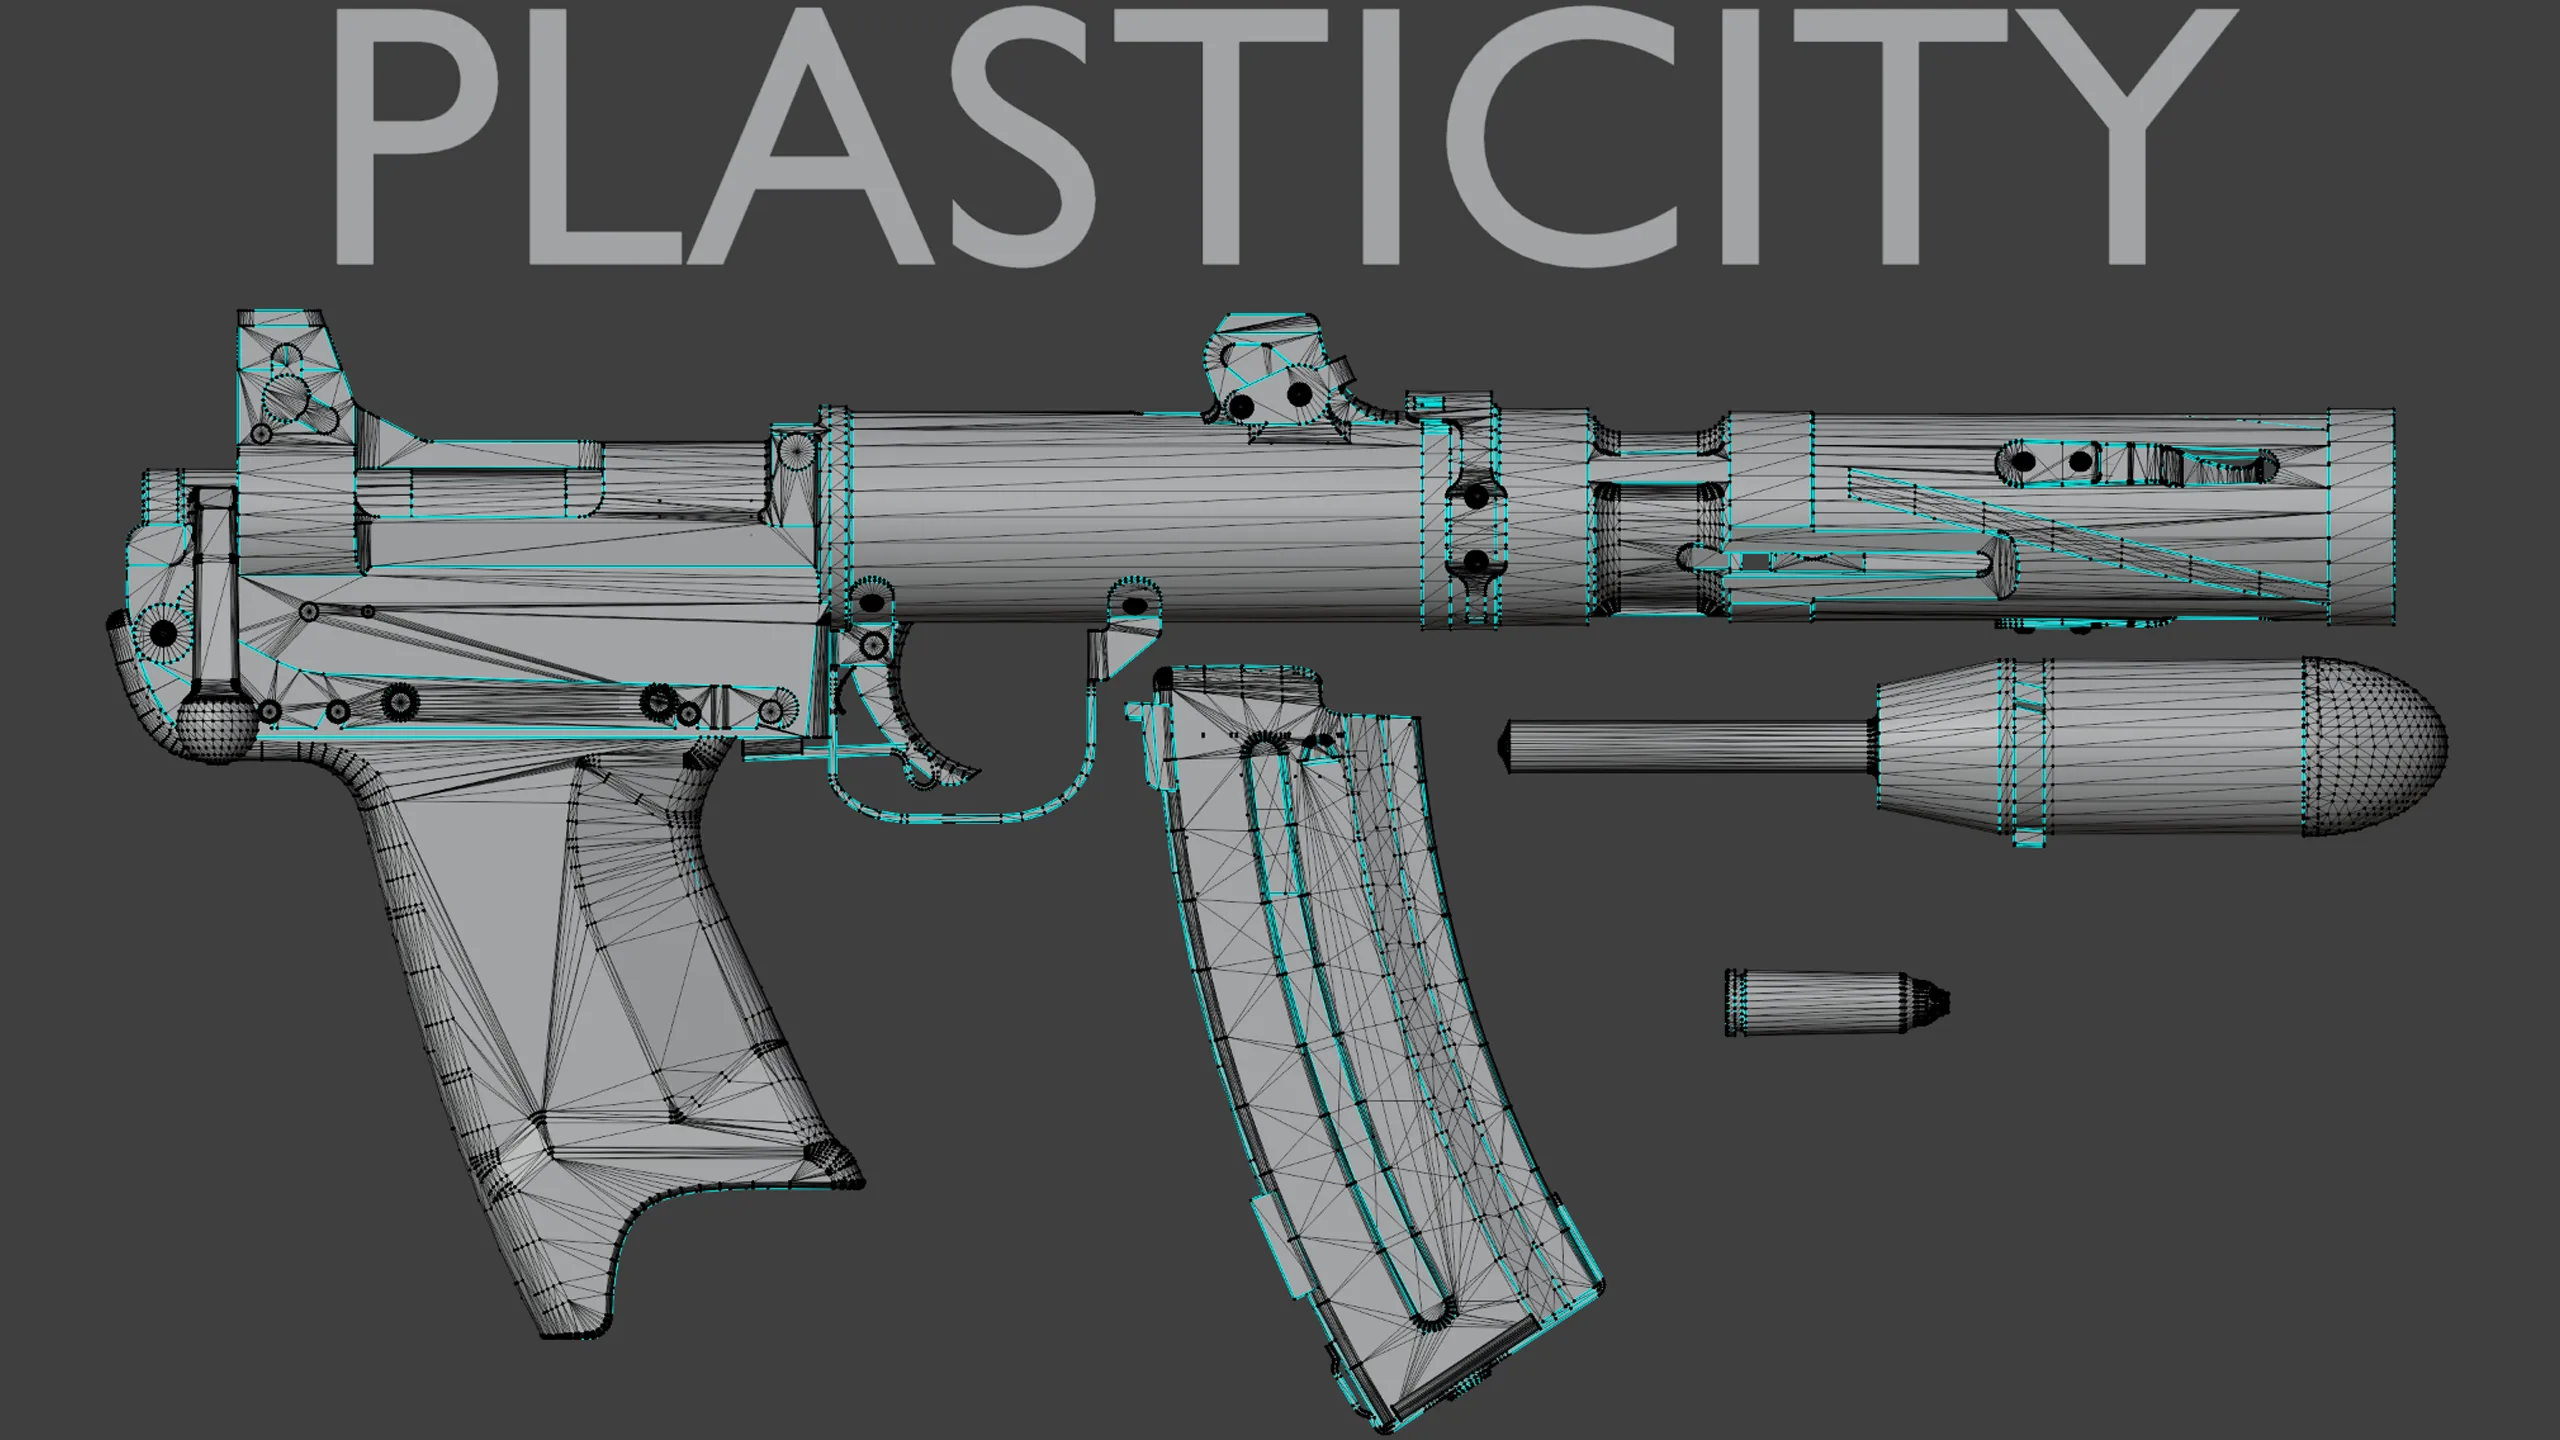
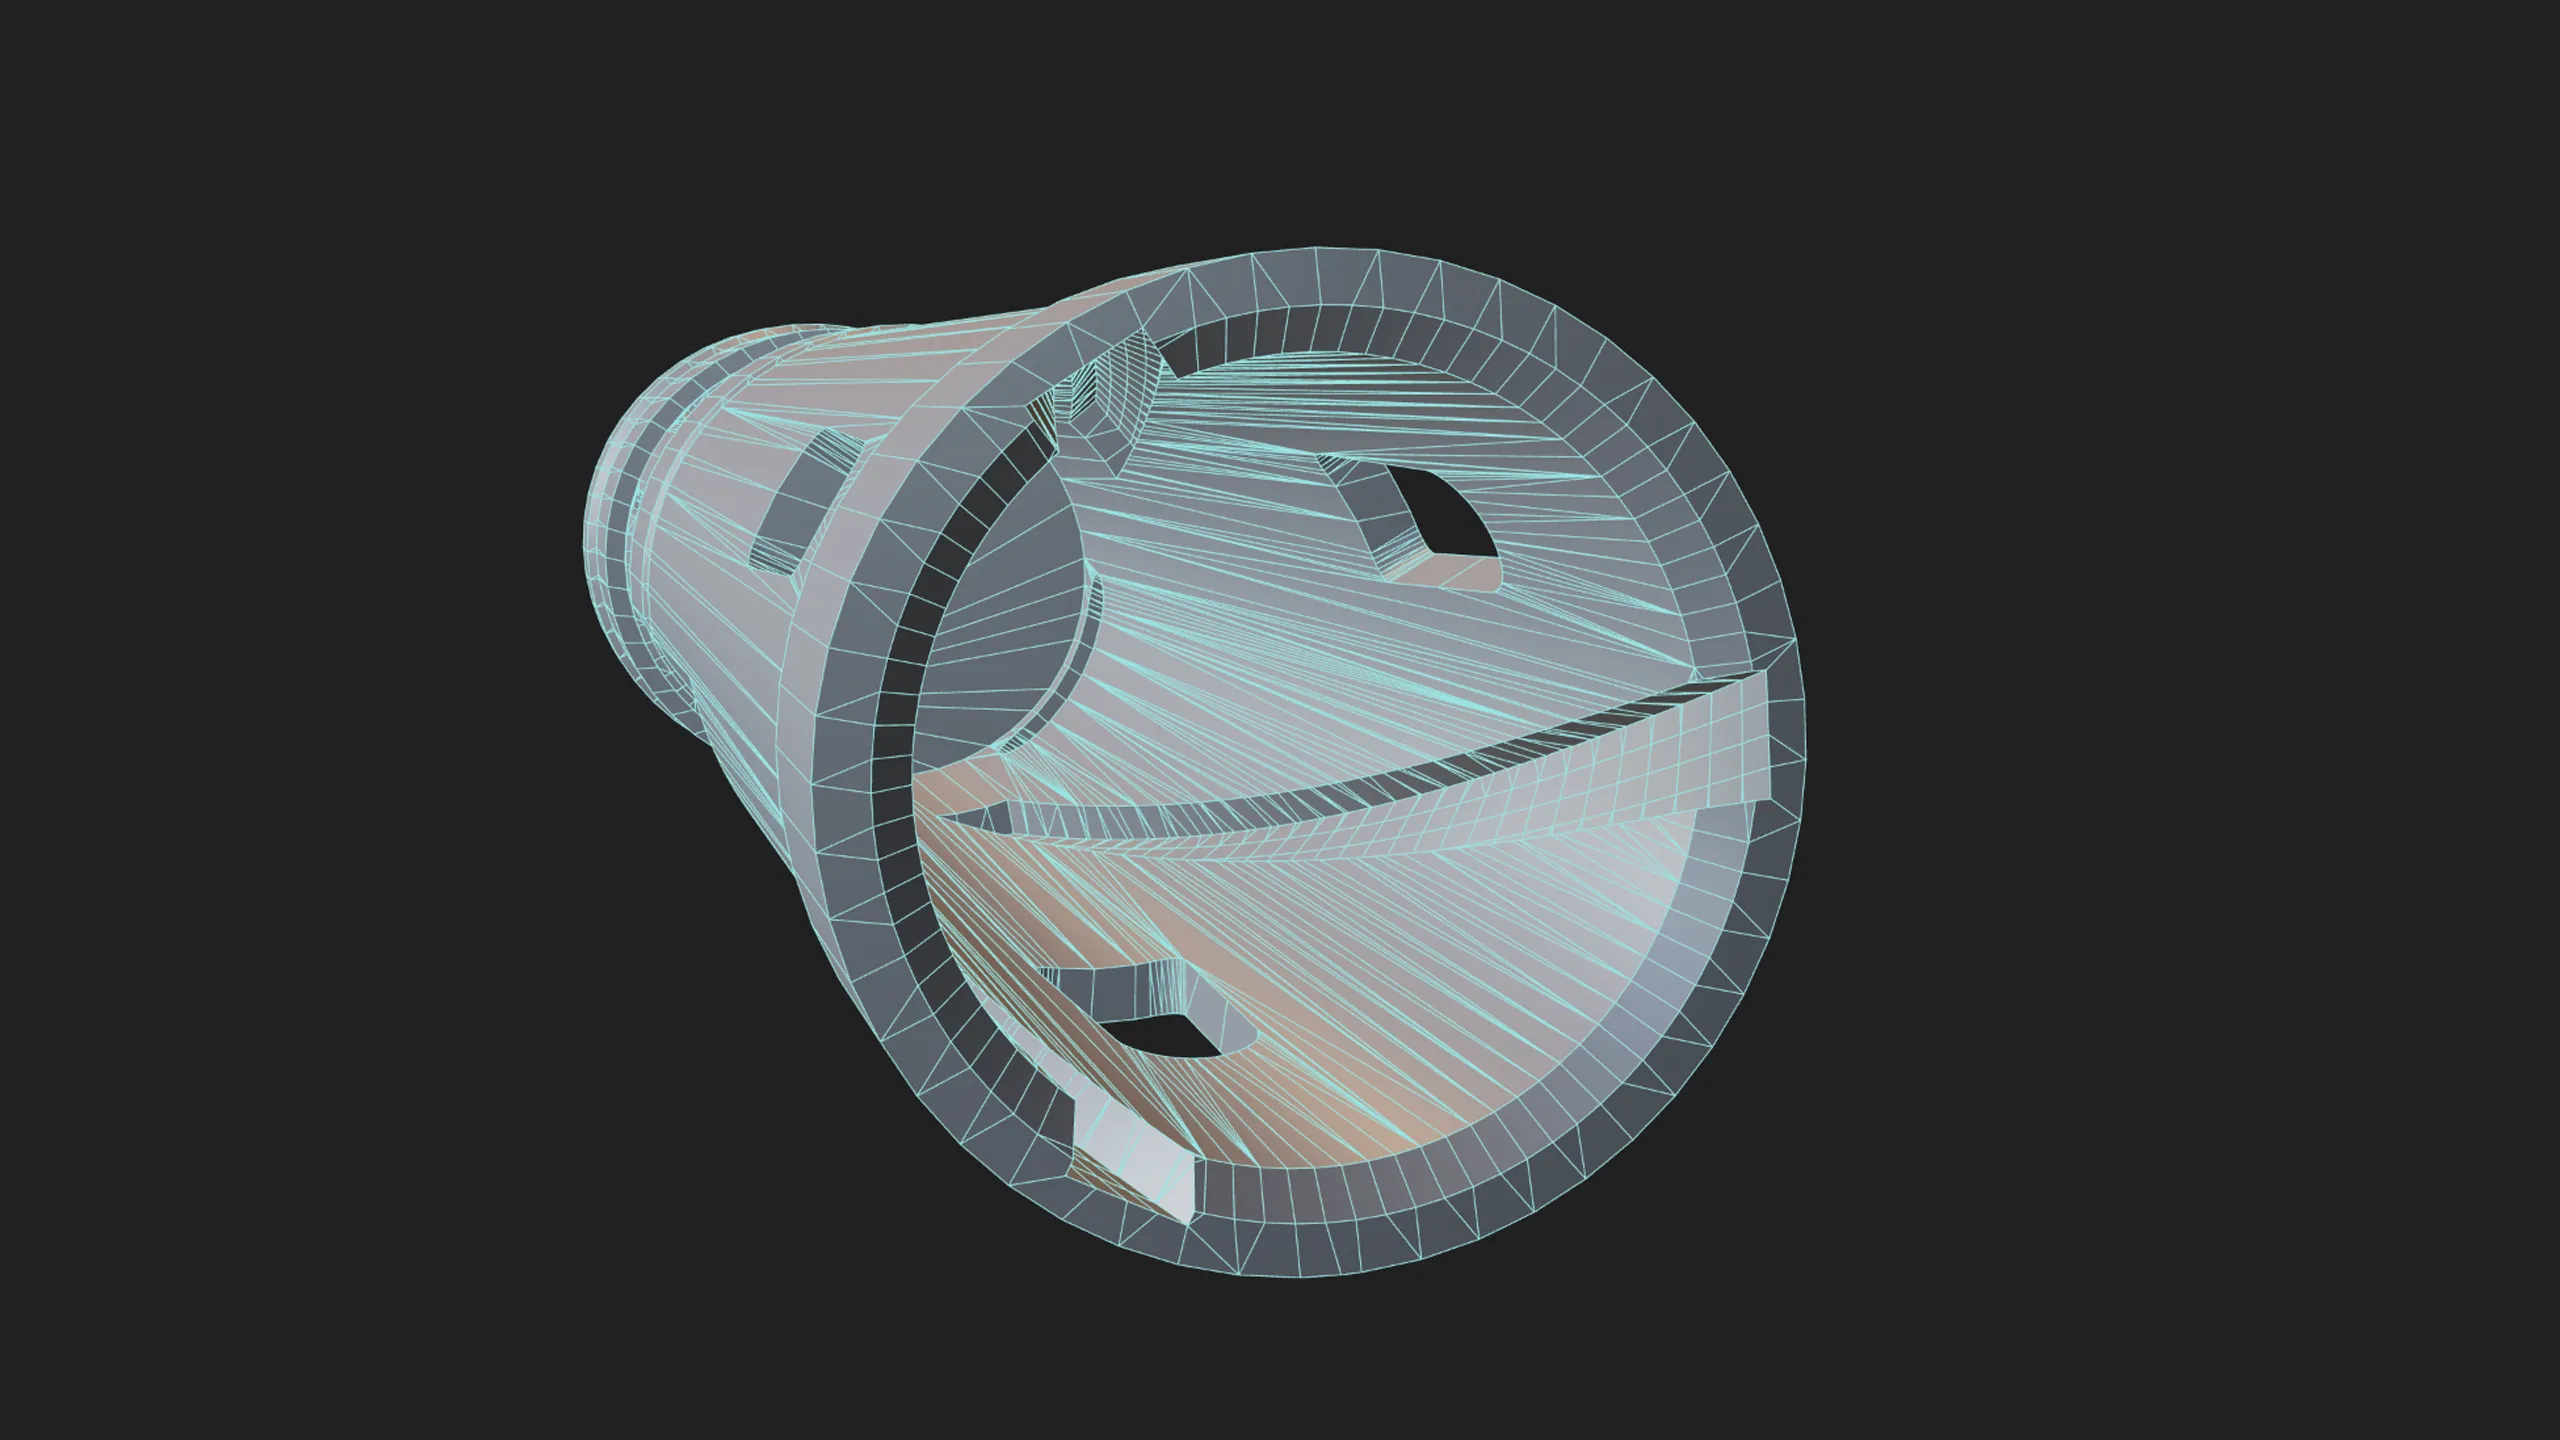 Before Support LoopsAfter Support Loops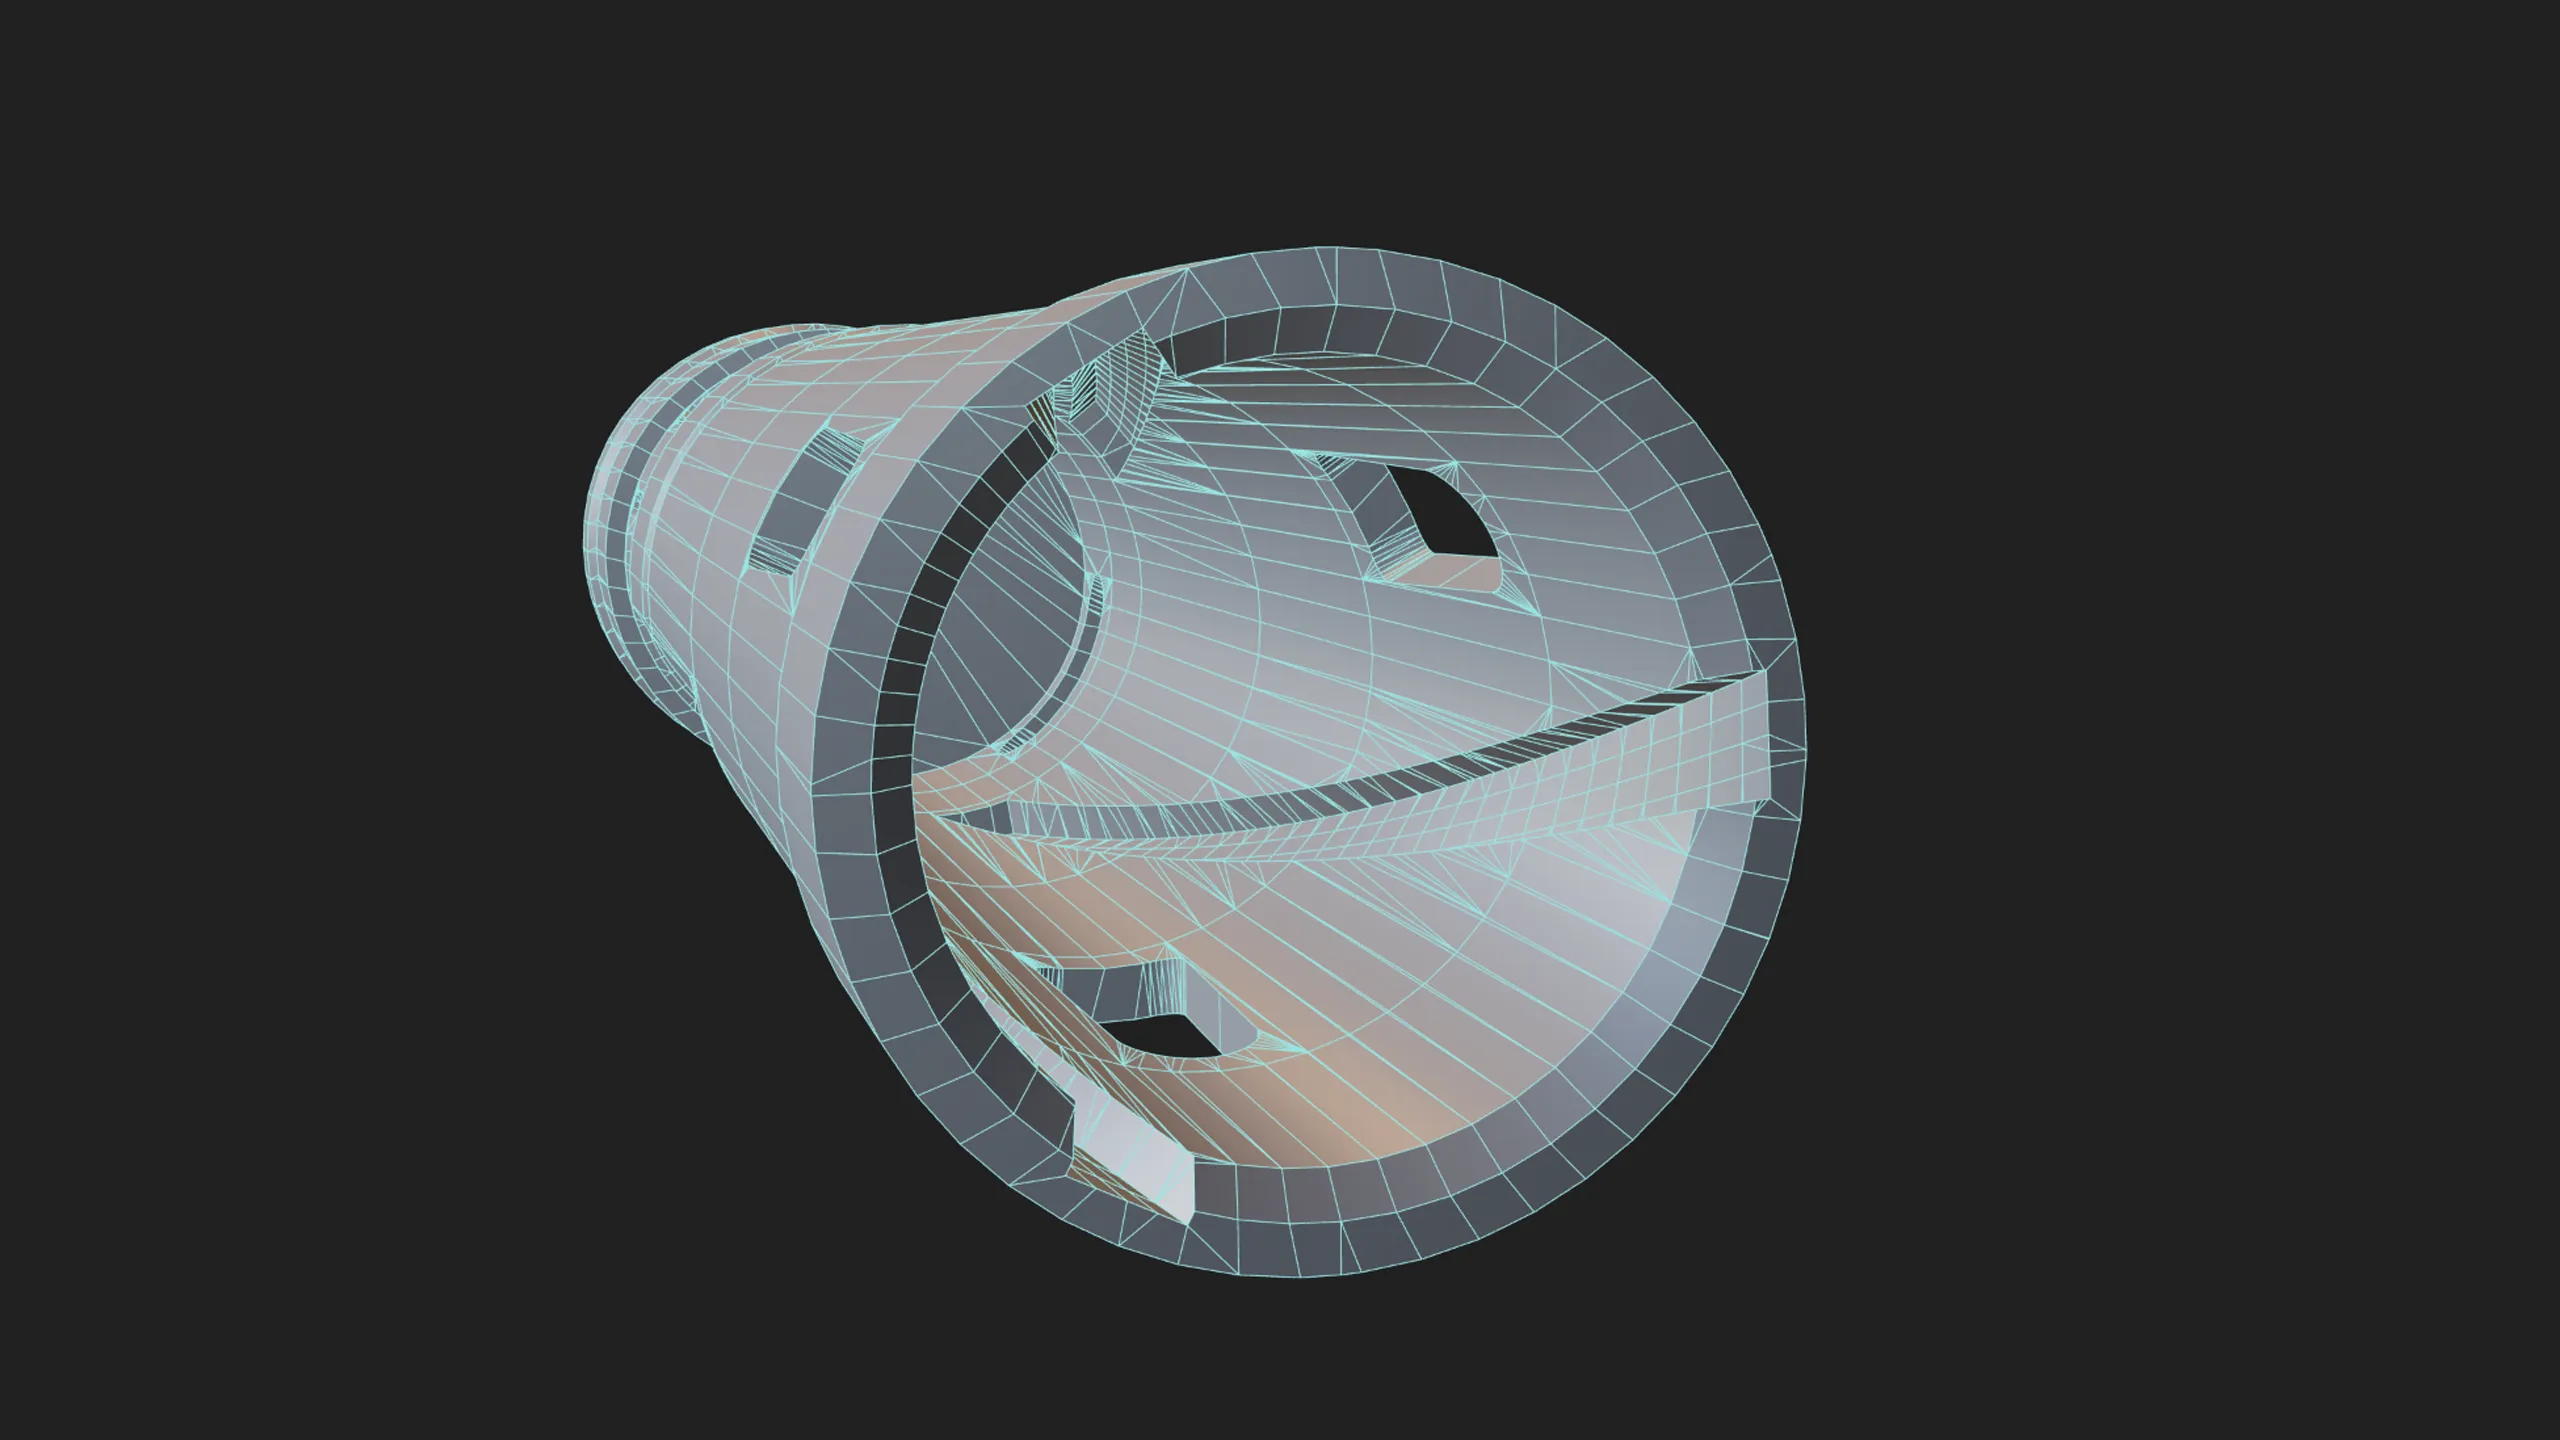
Retopology
Once your CAD data has been converted, it’s time to clean up the mesh. Straighten edges, collapse edges, weld verts, and eliminate long, thin triangles until you have an optimized model. Check for non-manifold geometry while you’re in there, as CAD data sometimes produces it.
I found the Blender plugin LoopTools essential here, especially the Space, Relax, and Circle operations for getting clean edge flow.
Your second objective is to remove or minimize the shading artifacts that inevitably appear during retopology, particularly on cylindrical areas. Support loops are integral for minimizing pinching. The key to eliminating shading artifacts is keeping faces planar, avoiding long thin triangles, and keeping edges parallel and evenly spaced.
Last, go through the model and remove occluded geometry. This will save you tris and UV space.
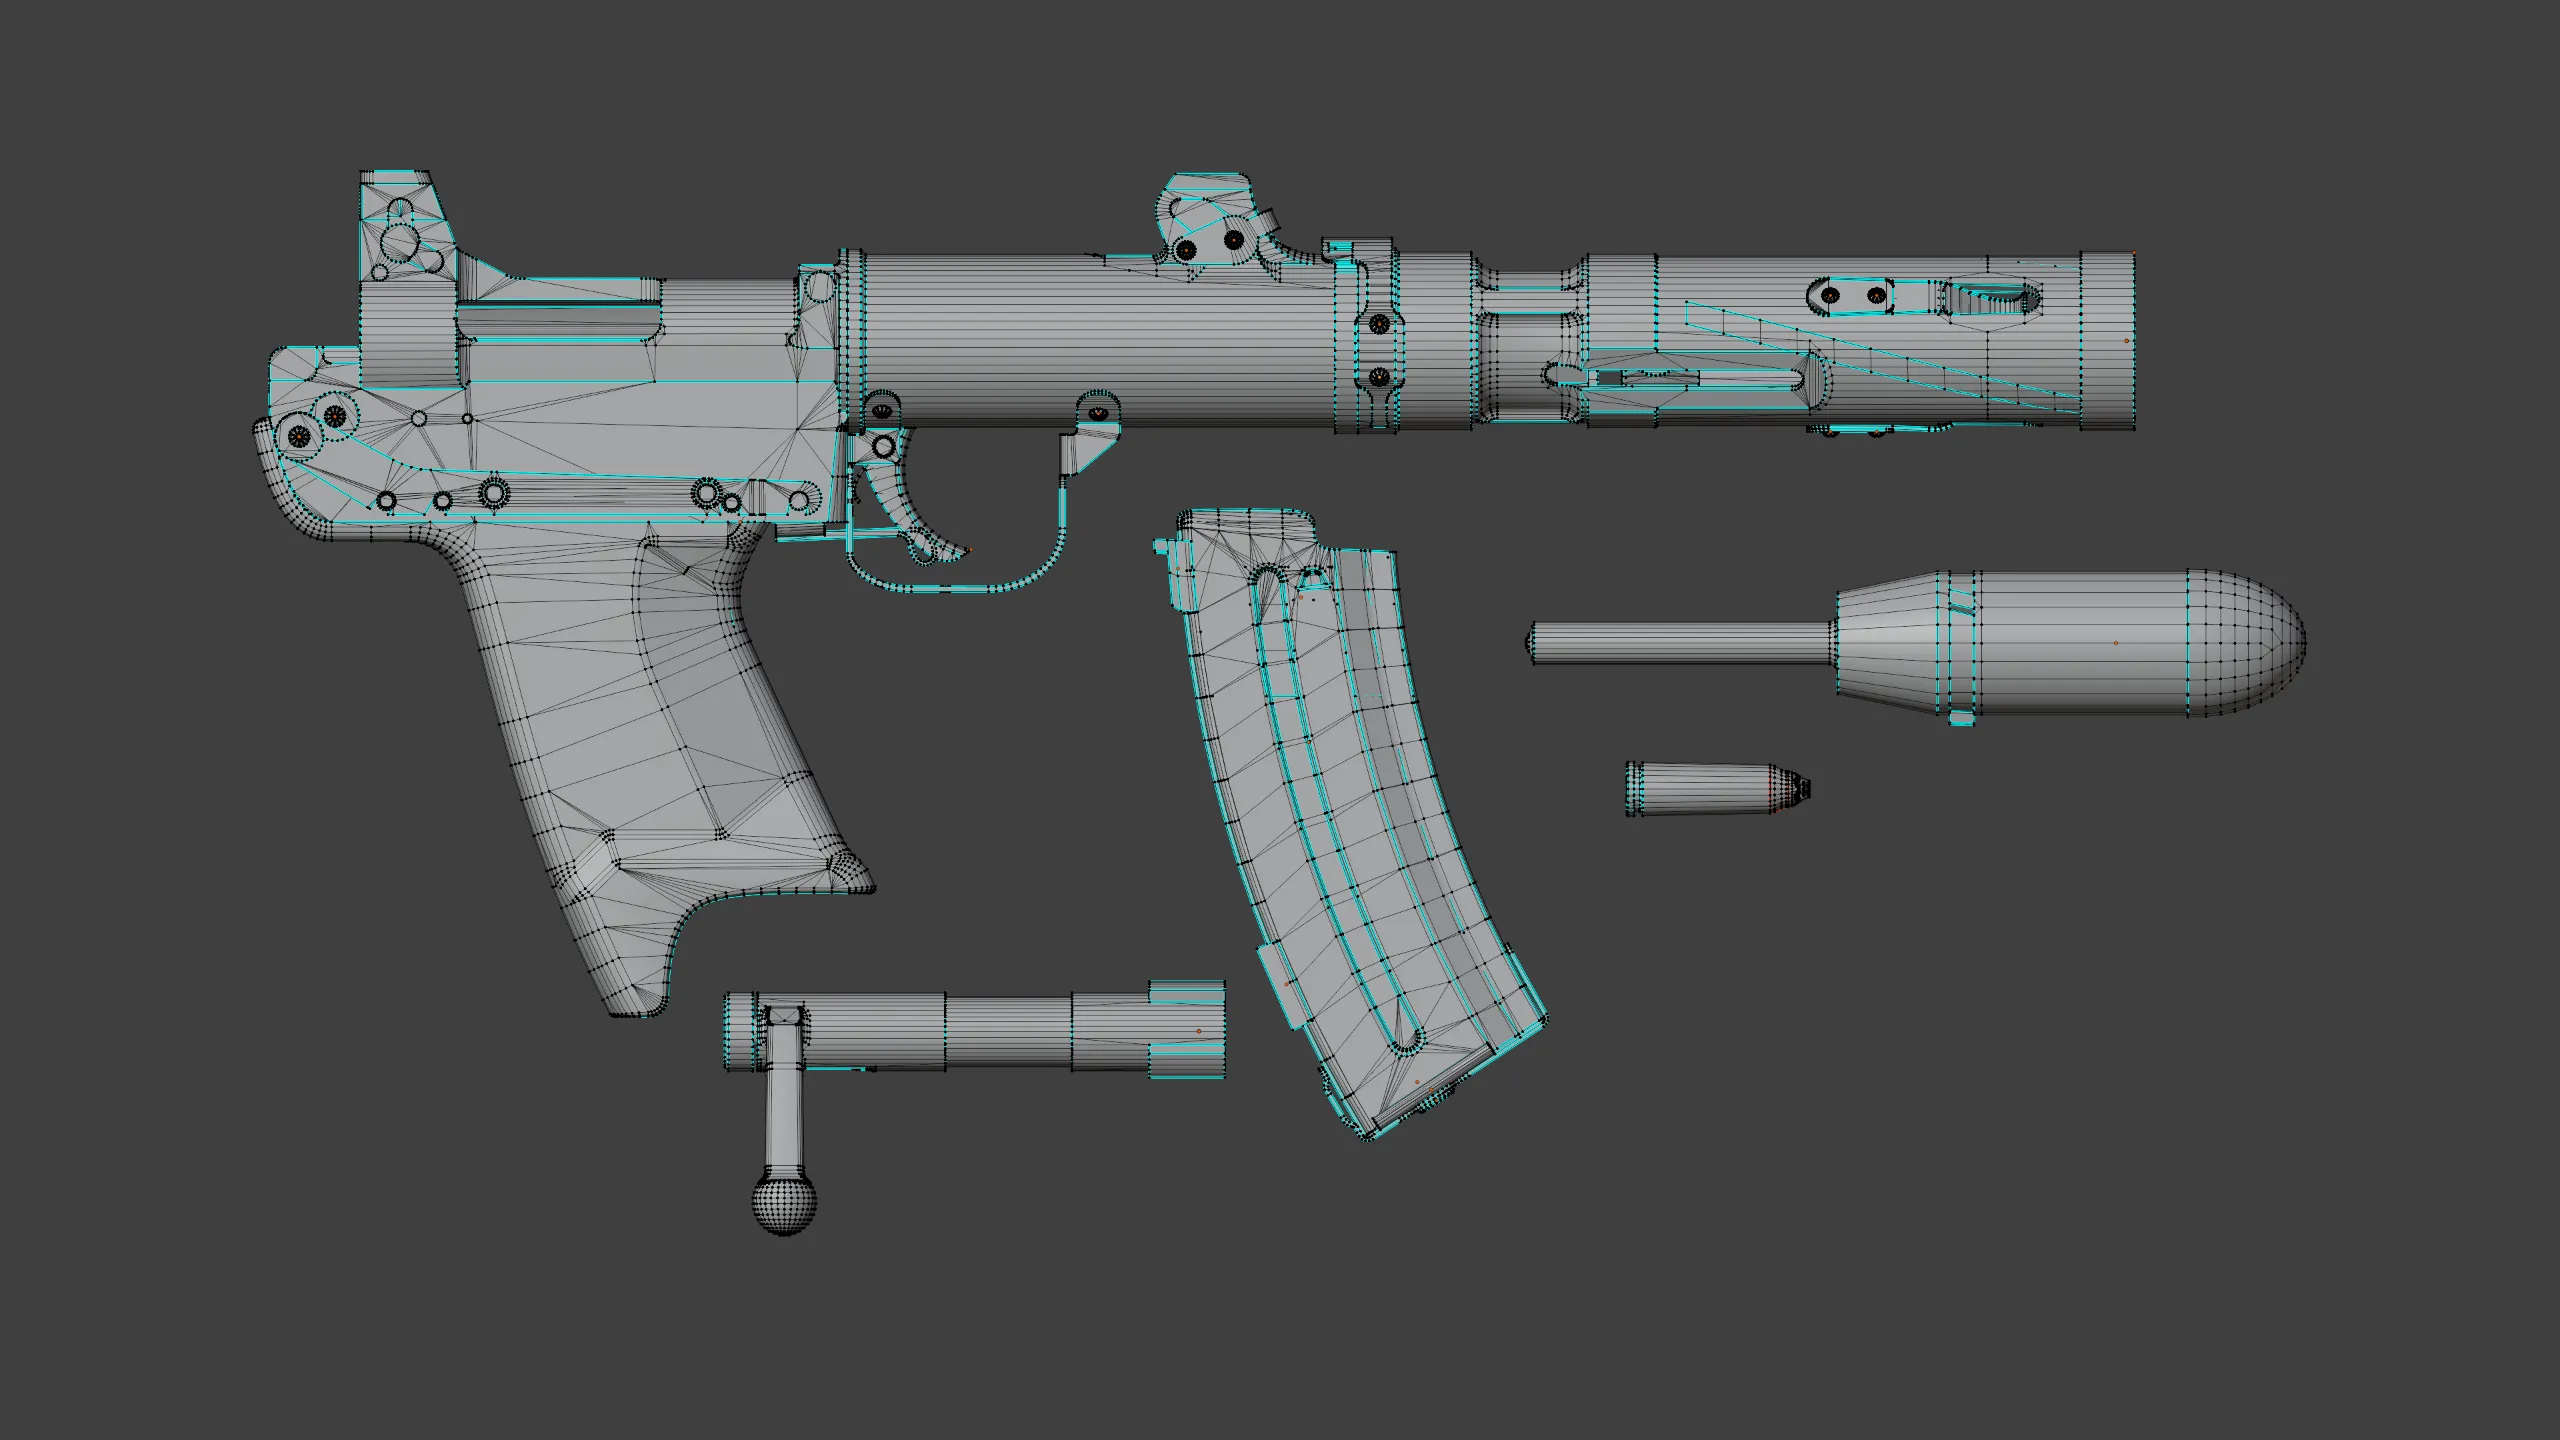
UV Unwrapping
I’ll be unwrapping in Blender. Before doing anything, make sure your model’s scale is correct and applied, as this affects texel density later. From there, follow standard practice: place seams on hard edges and 90-degree transitions.
Be smart about seam placement. Focus on areas with low camera traffic, like the underside of the gun, or places where geometry covers the seam anyway, like where rivets intersect the mesh.
Straighten your UVs. Straight islands pack far denser, allow for much higher texel density, and remove aliasing from your bakes. Pin verts and align edges even at the cost of distortion - some distortion is fine as long as the island ends up straight. Don’t be afraid to cut extra seams into an island to relieve major distortion, since tri-planar projection in Substance Painter can often minimize or completely hide the result.
If you’re still low on texel density, consider mirroring identical islands: duplicated rivets, bolts, and screws. Other prime targets are areas with low camera traffic or no need for unique detail - the insides of handguards, magwells, weapon chambers, and Picatinny rail slots, among others.
This challenge requires three texture sets: 1k for the ammo (grenade and bullet), 2k for the magazine, and 4k for the gun itself.
I arrive at texel density by first packing the set that will take up the most surface area - here, the 4k gun. I pack it with a margin of 0.003, then scale it up until it can’t go any larger without spilling out of UV space. In this case that landed at 96 px/cm. Apply that same texel density to the other sets to keep resolutions consistent across the model.
To squeeze out even more, you can halve the texel density on islands you know the viewer will never see, like the chamber interior or the inside of the magwell and grip.
With the model unwrapped and packed, it’s time to move on to the high poly.
High Poly and Baking
I used a combination of a ZBrush polish-and-morph workflow and Marmoset’s bevel bake to get my high poly.
I pulled out the pieces that would take up the majority of camera traffic - receiver, barrel, grenade, magazine, and so on - exported very dense versions of them from Plasticity, and imported them into ZBrush.
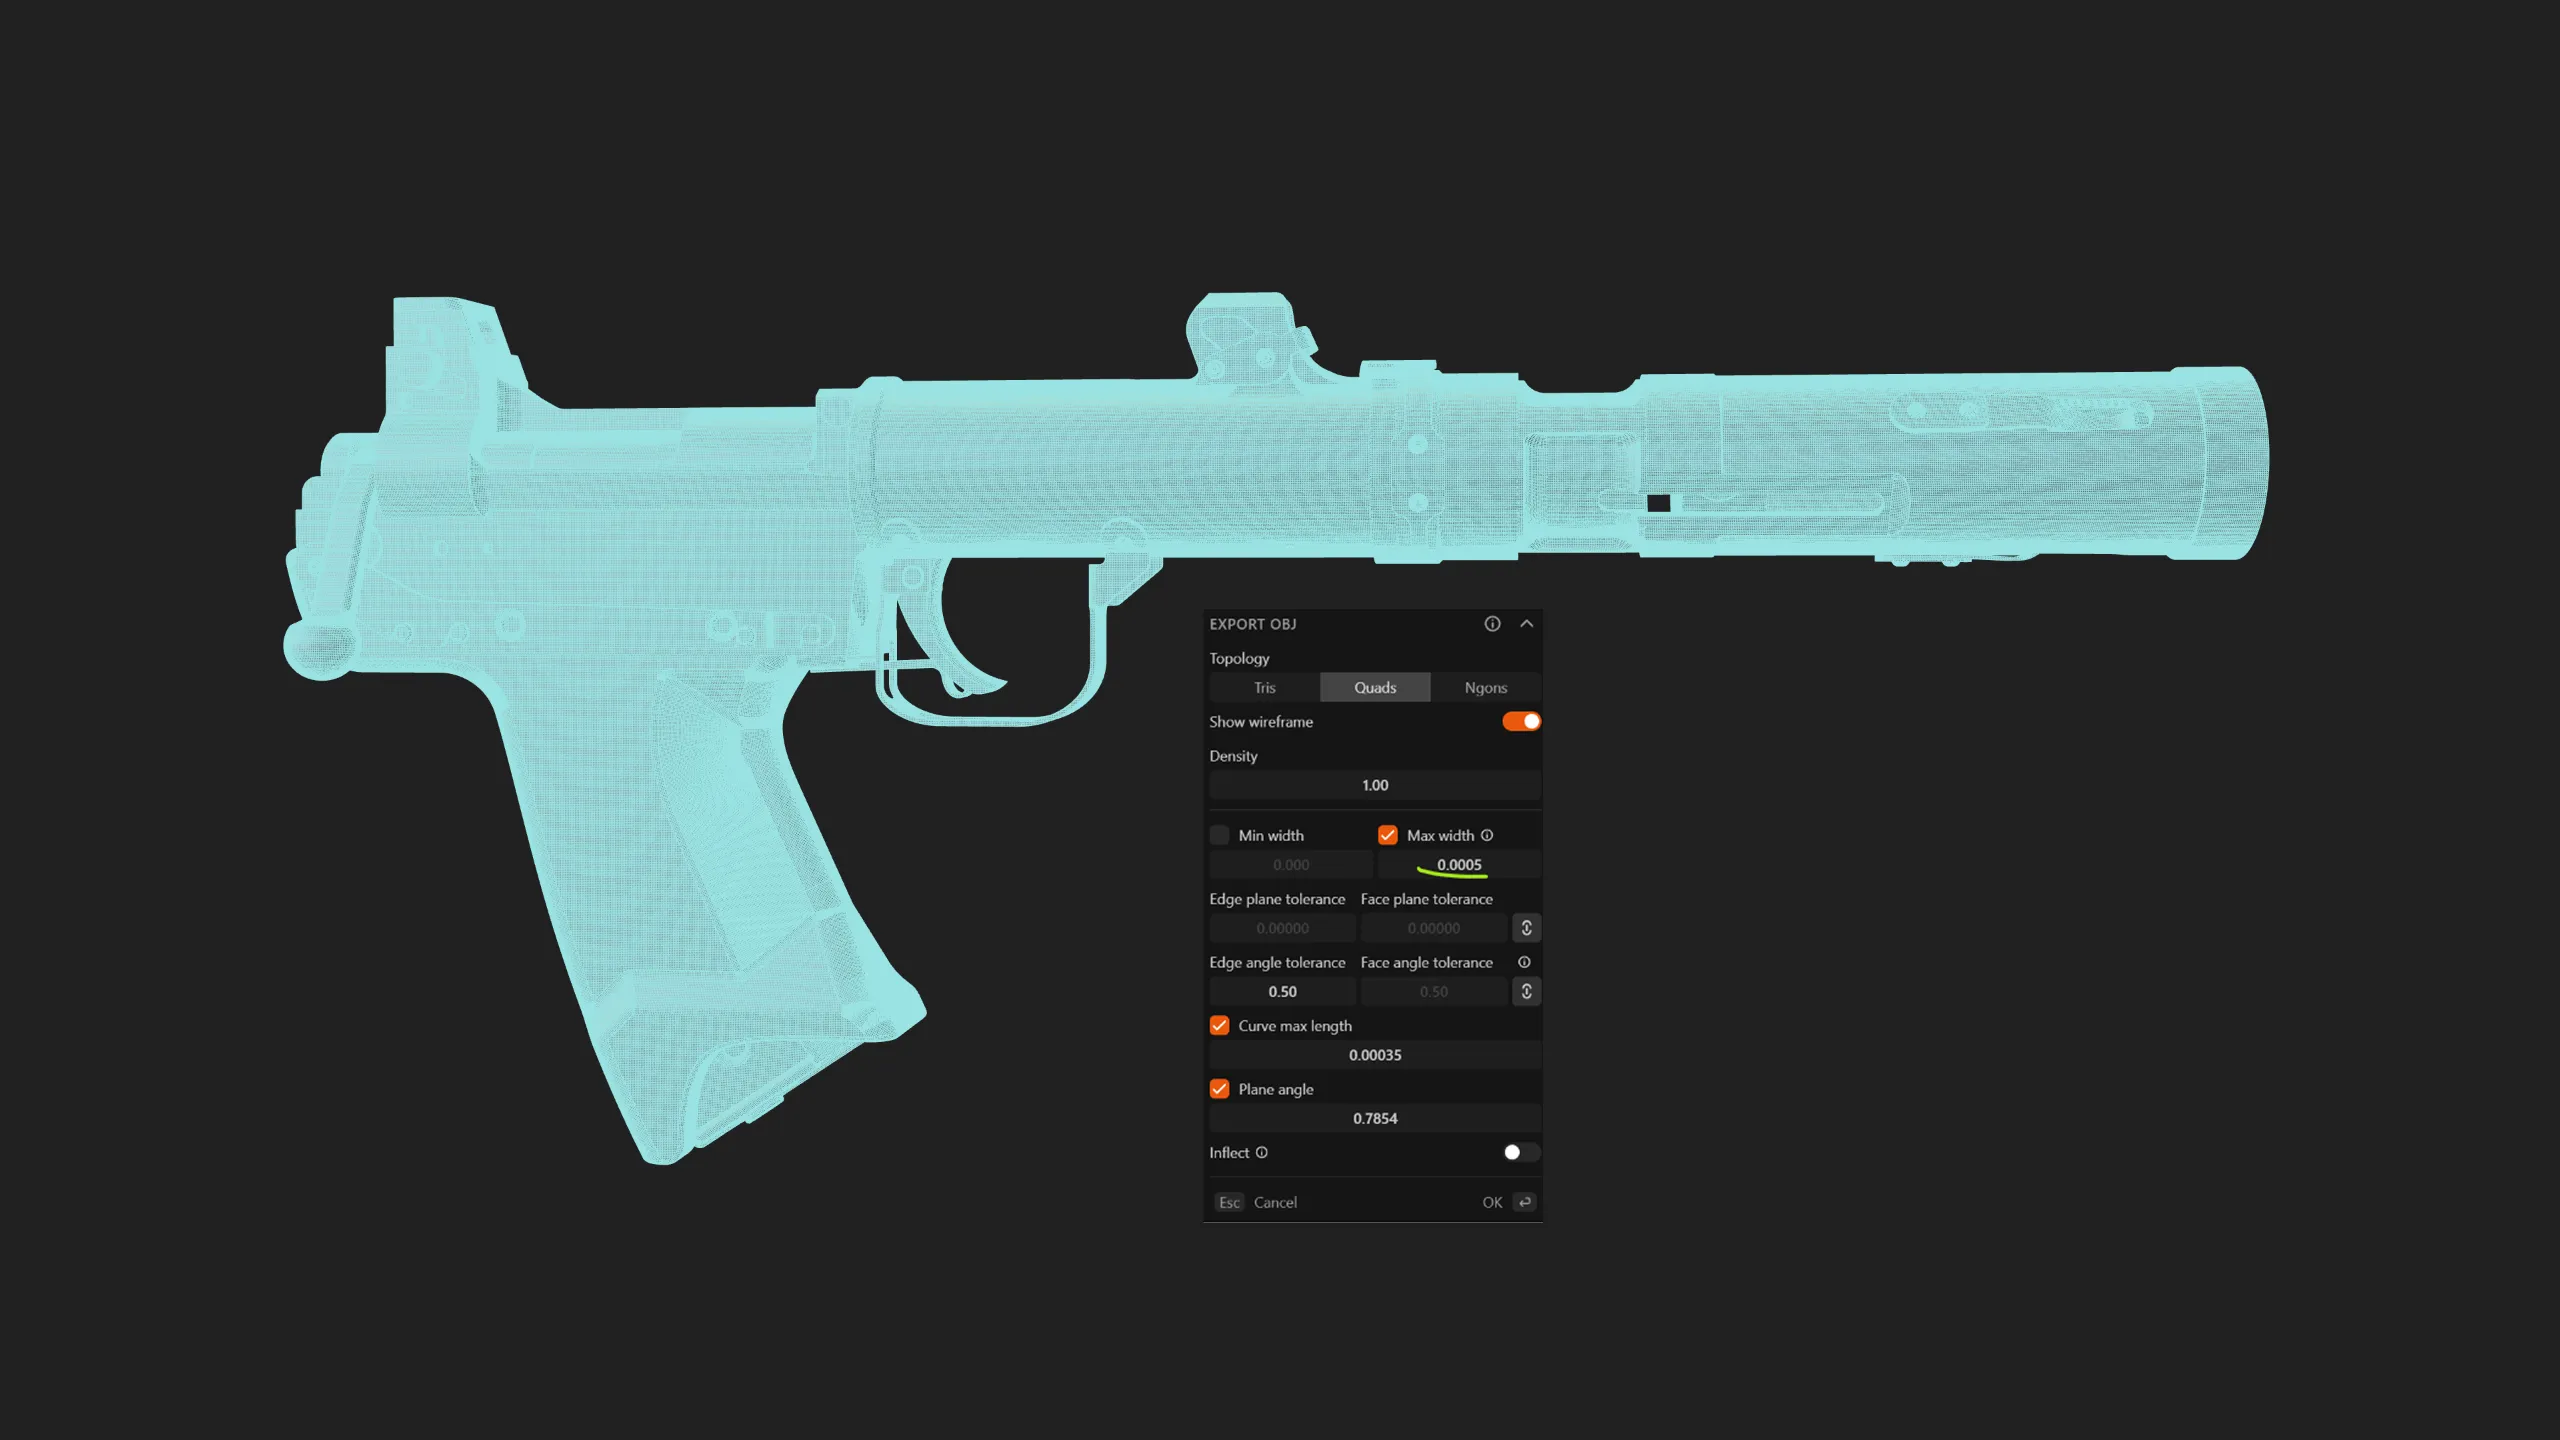
From here we follow the standard polish and morph pipeline. Import, then dynamesh your model. If dynamesh isn’t giving you enough resolution, go to Geometry → Size, write down the mesh’s original XYZ dimensions somewhere, then scale it up 2-3x to get more resolution. Once you have the point count you want, size the mesh back down to its original XYZ scale.
Next, go to Deformation → Polish By Crisp Edges and polish to the tightest bevel you want. This bevels the entire model evenly. If the bevel is too subtle, hit the circle next to the button to increase the polish amount. If the result comes out jagged, run a regular Polish over it - not Polish By Crisp Edges - to smooth things out.
Now go to Morph Target → Store MT. This stores the tight bevels we’ll be painting back in later. Head back to the Deformation tab and run Polish By Crisp Edges plus Polish until you hit your mesh’s maximum bevel.
Finally, grab the Morph brush and go over the mesh, painting the tighter bevels back in where they’re needed. Your Z Intensity controls how tight the bevel gets as you brush.
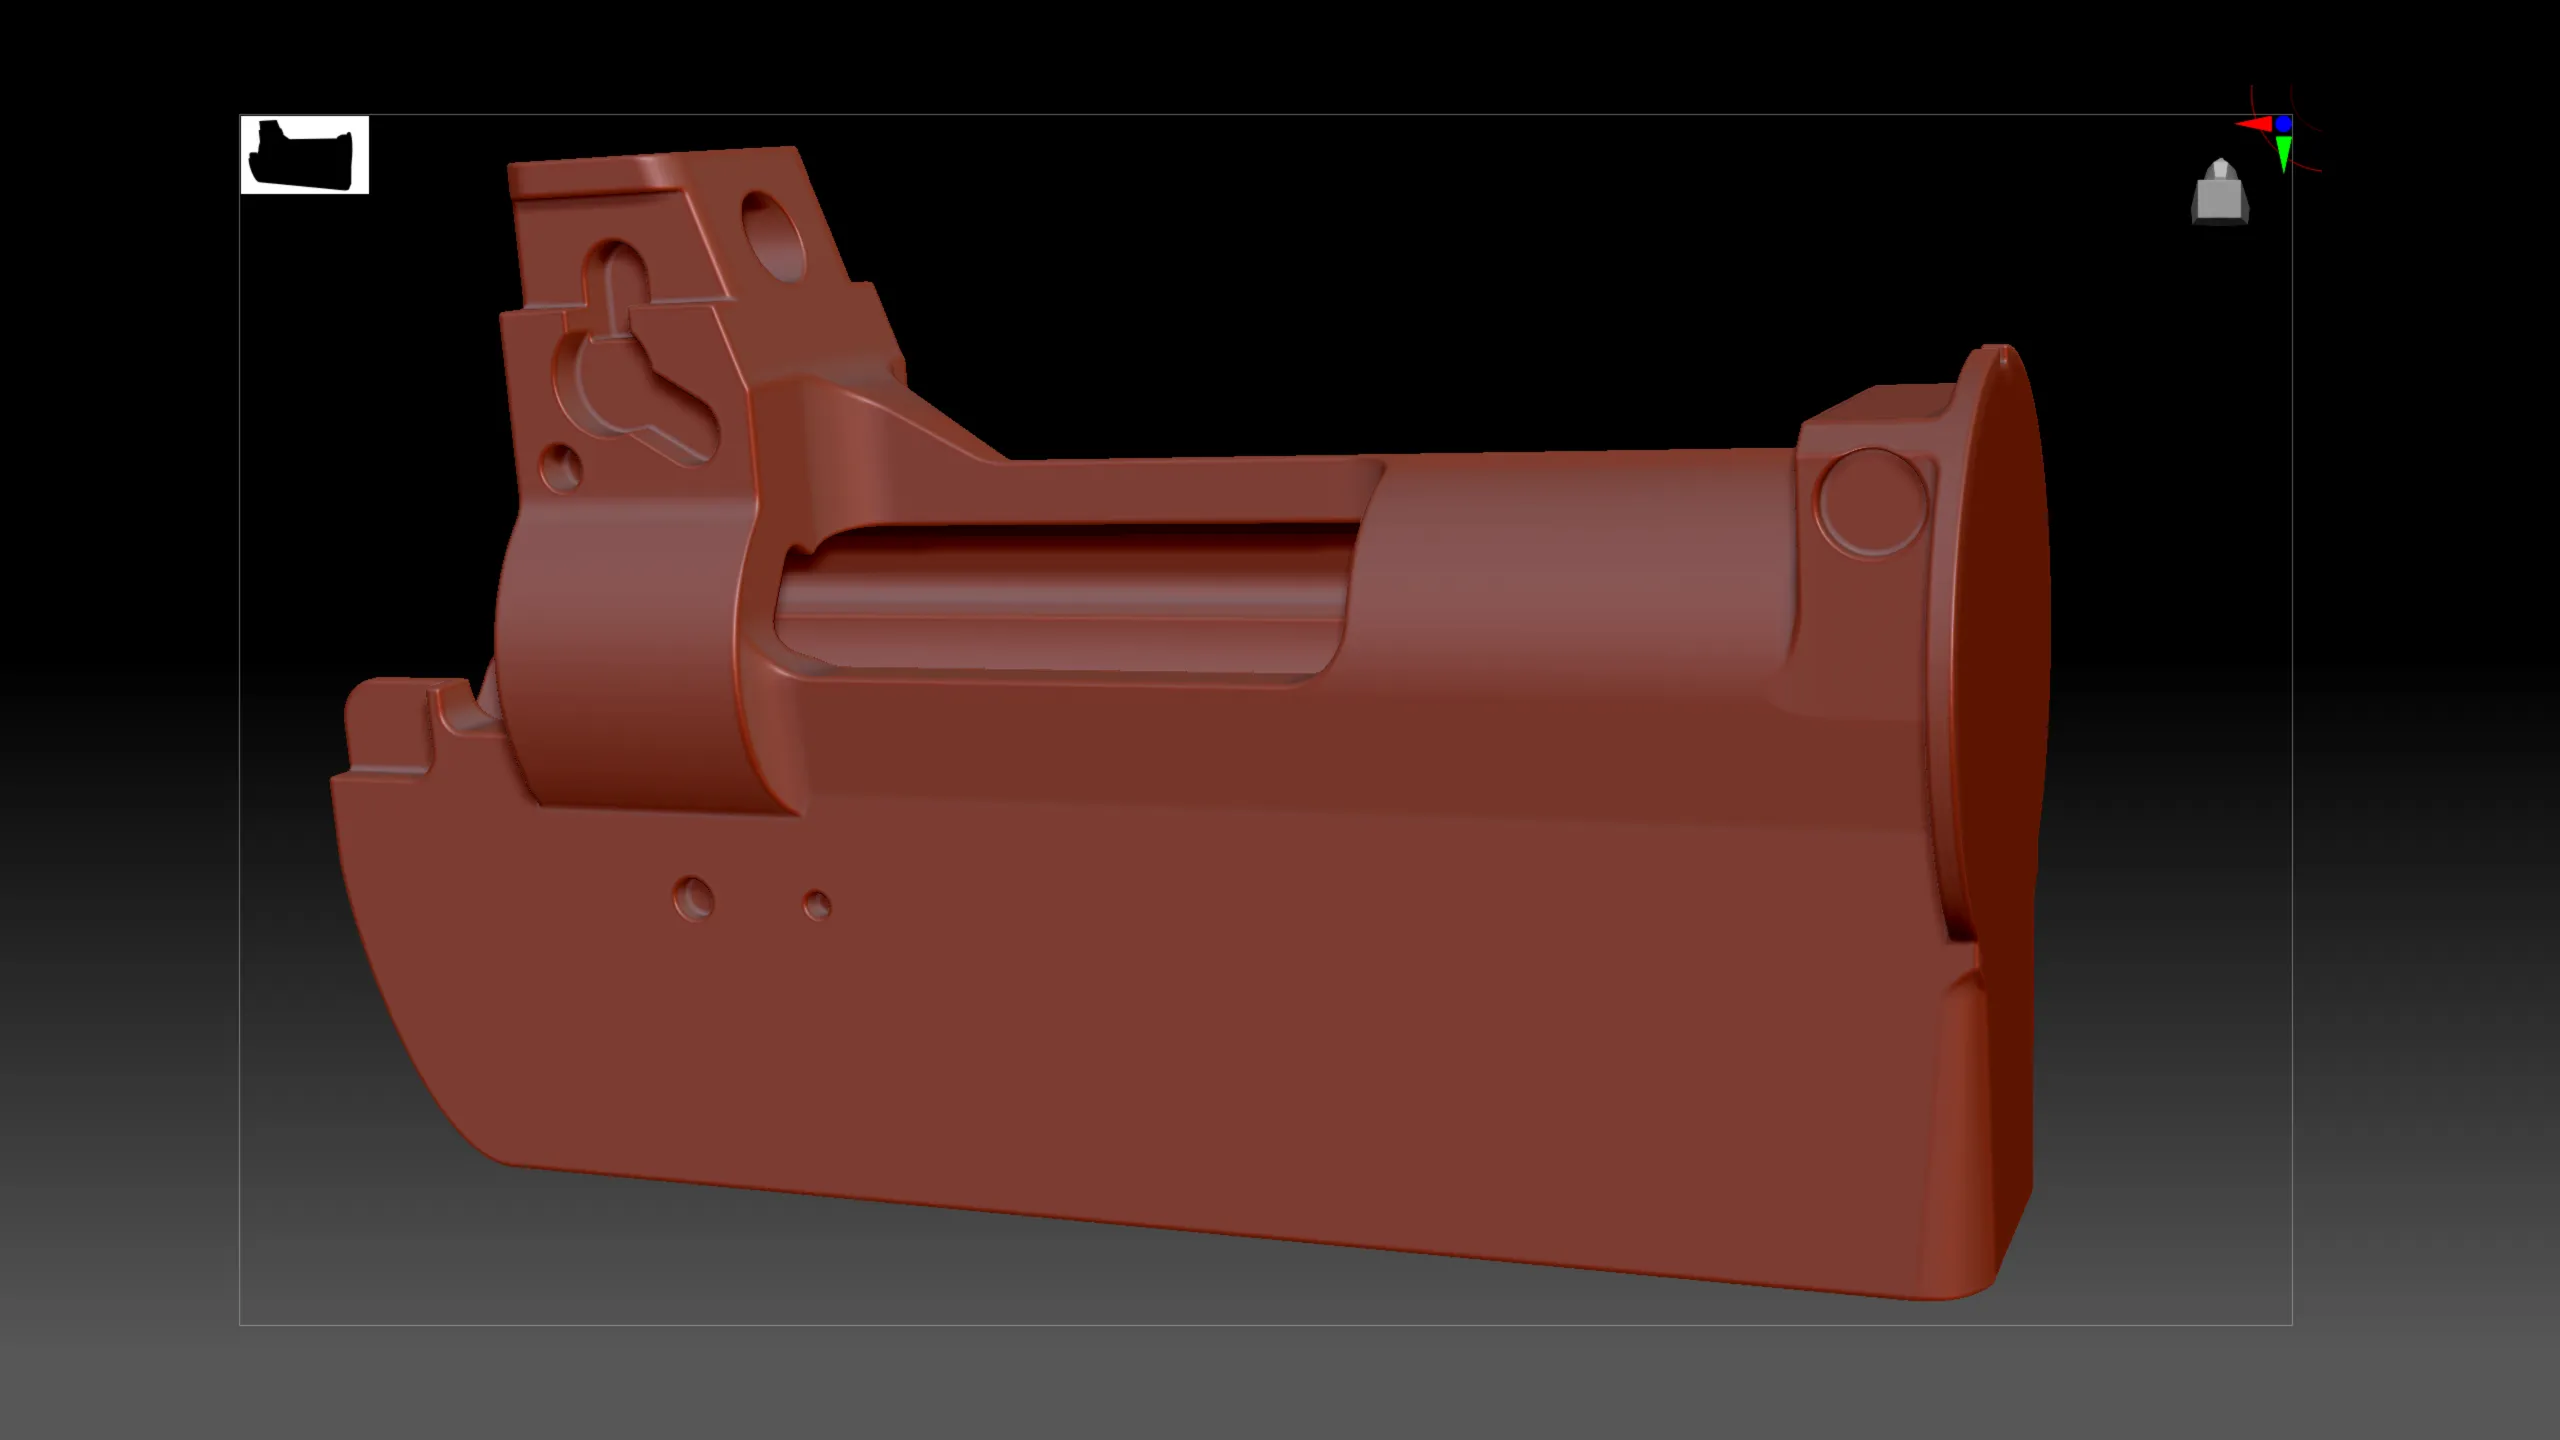 Before MorphAfter Morph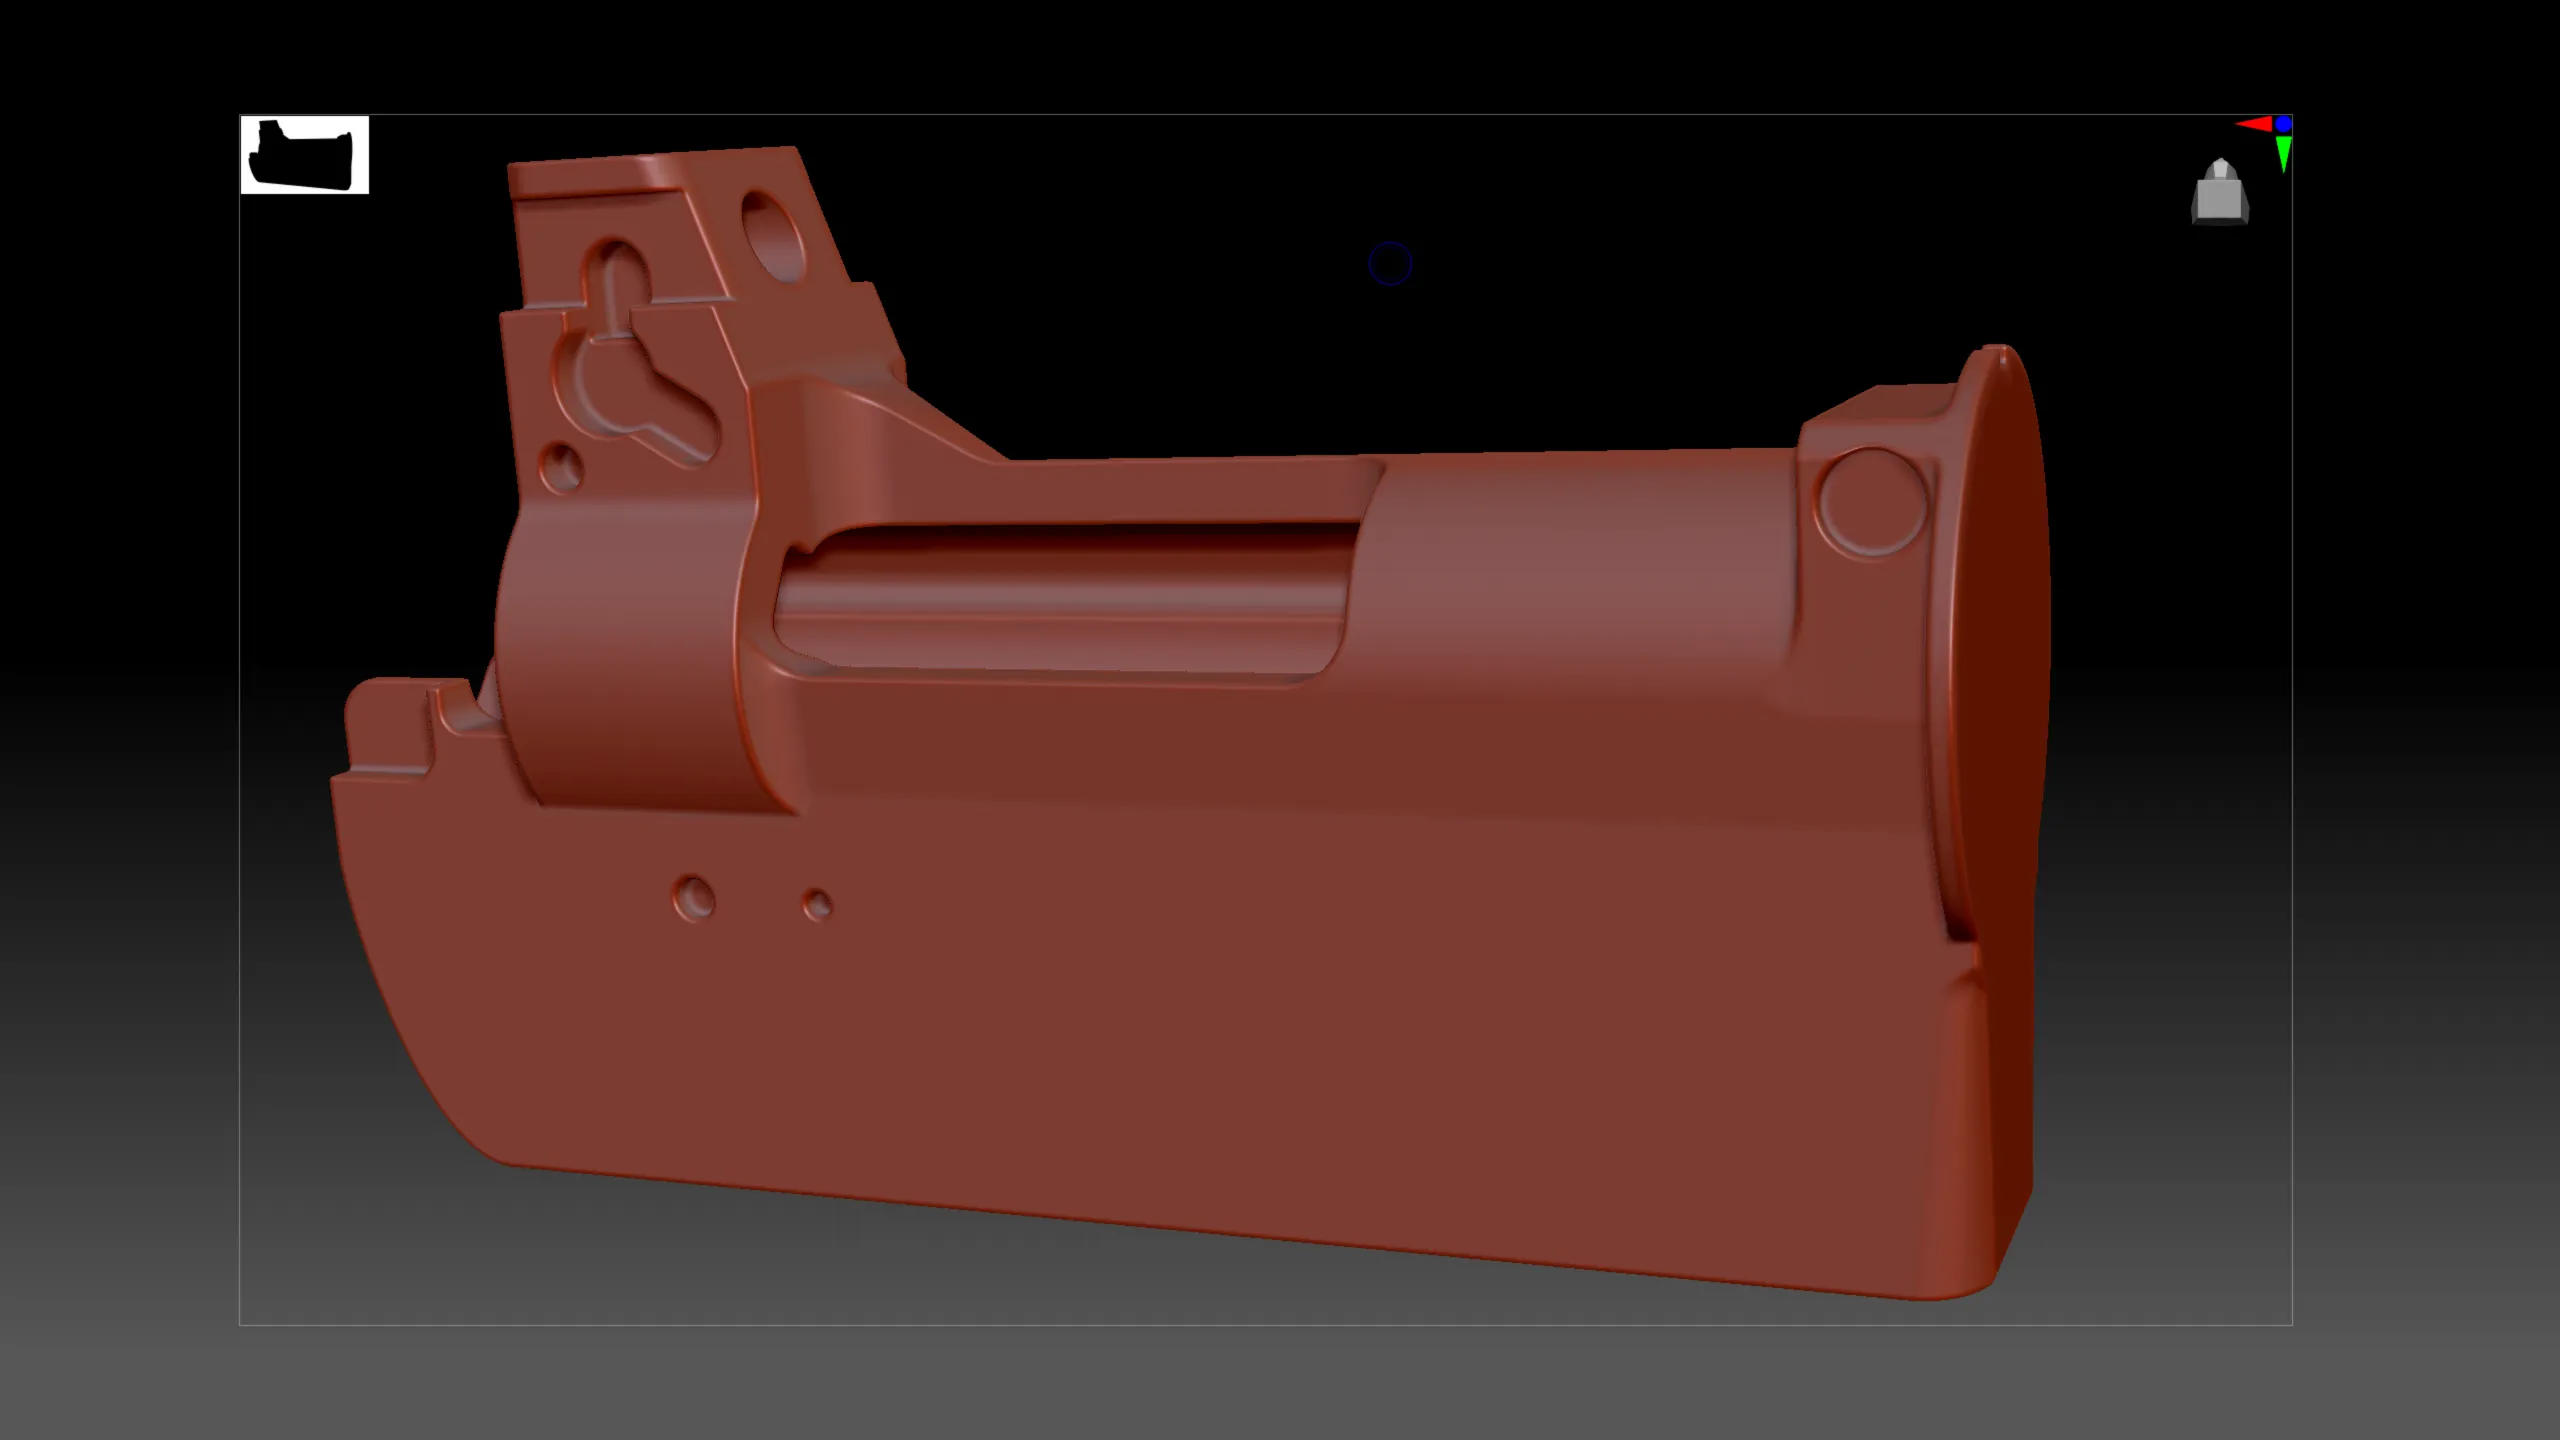
Once the pieces that needed a unique damage and wear pass are done, export the ZBrush meshes to Marmoset Toolbag for baking. Import your low poly and prep it. Before baking, we’ll use Marmoset’s built-in bevel shader to apply a procedural bevel to everything that didn’t need a ZBrush pass: duplicate those objects, drop them into the high poly folder alongside the ZBrush meshes, and apply the bevel shader. Now you’re ready to bake.
Once the normal maps are baked, export them to Substance Painter.
Texturing
Texturing - the most fun part, and where all the fruits of your labor finally show up in the piece. Before touching a single texture, though, we need to set up the project config so what we see in Substance Painter translates directly to game engines or to Marmoset for renders.
First, set color management to ACES. This is the color profile most modern software uses to translate colors to our screens, and turning it on keeps your model consistent between Substance Painter and engines like Unreal.
Second, use a neutral HDRI - Tomoco Studio, which ships with Substance Painter, is a good one. A neutrally colored HDRI keeps your textures reading consistently across a variety of lighting conditions.
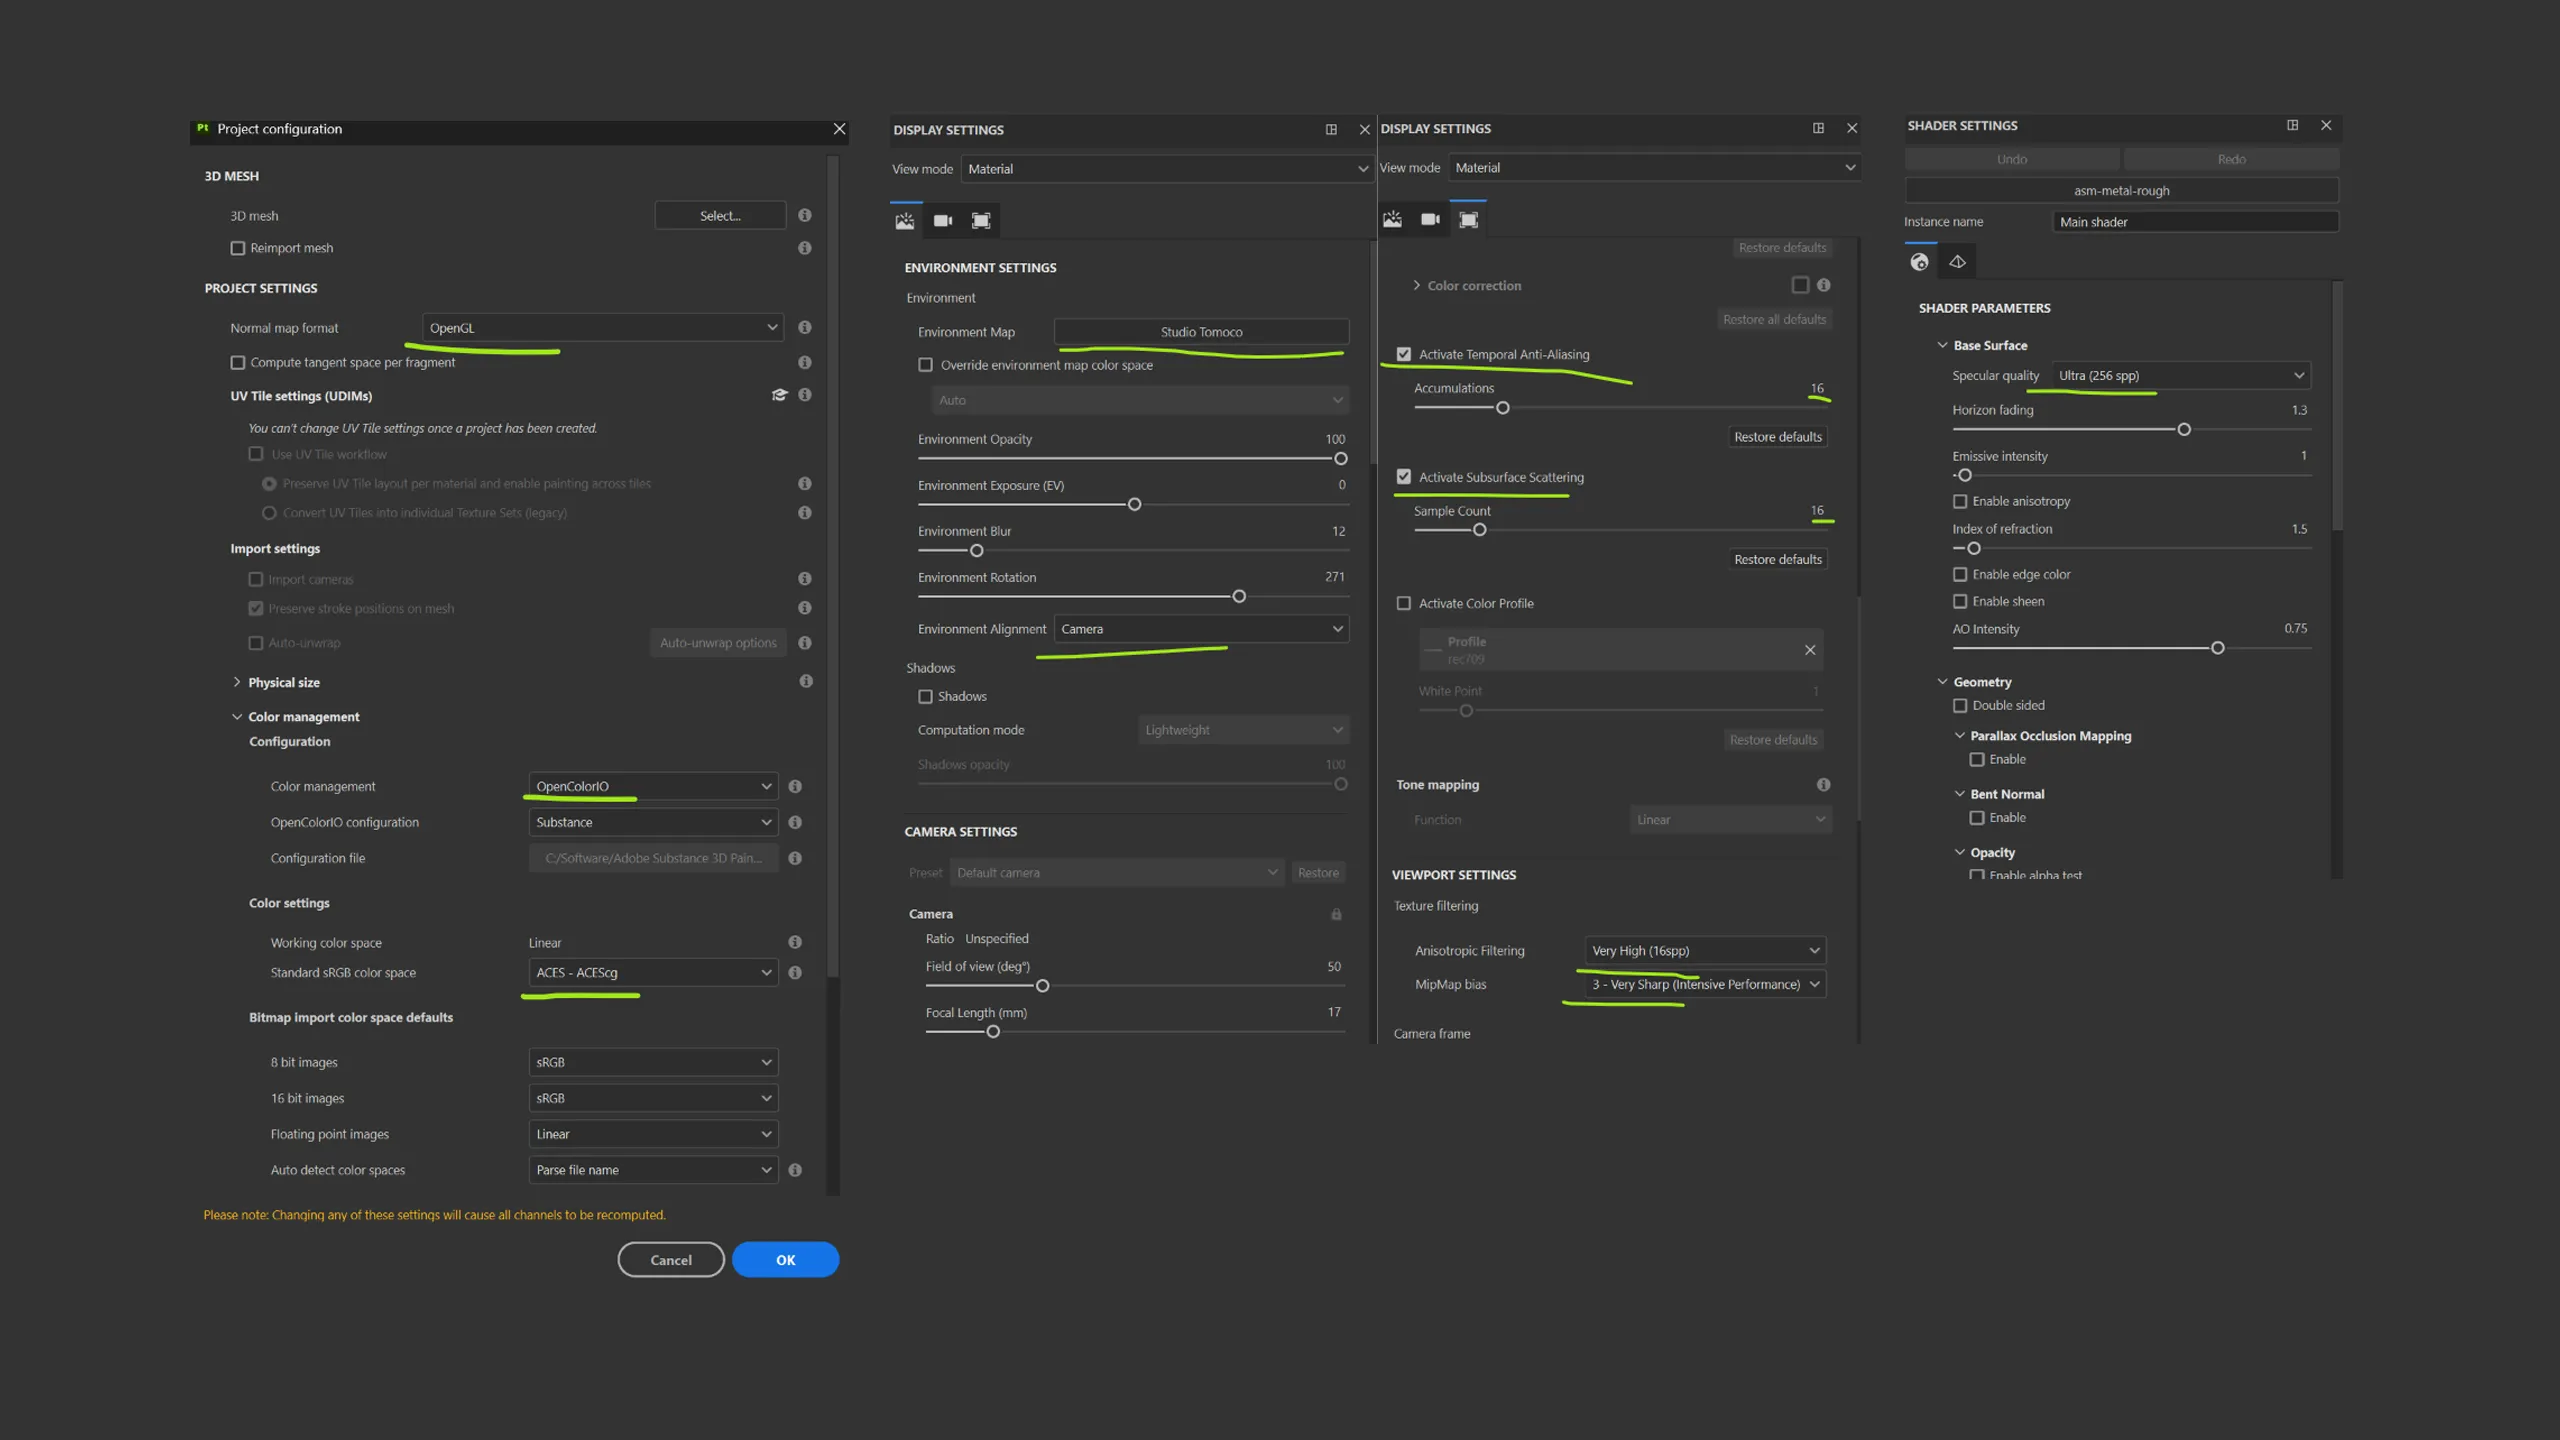
From there, follow the natural progression of how an object accumulates wear in real life. Start with base materials: the base color and roughness values of your metals and plastics. Then add color variation from surface treatments, plus normal and height detail for powder coating, brushing, and milling or forging marks. Next comes roughness variation from oils, fingerprints, and smudges. Then scratches, chipping, and paint or surface wear. Dirt, rust, and dust go last.
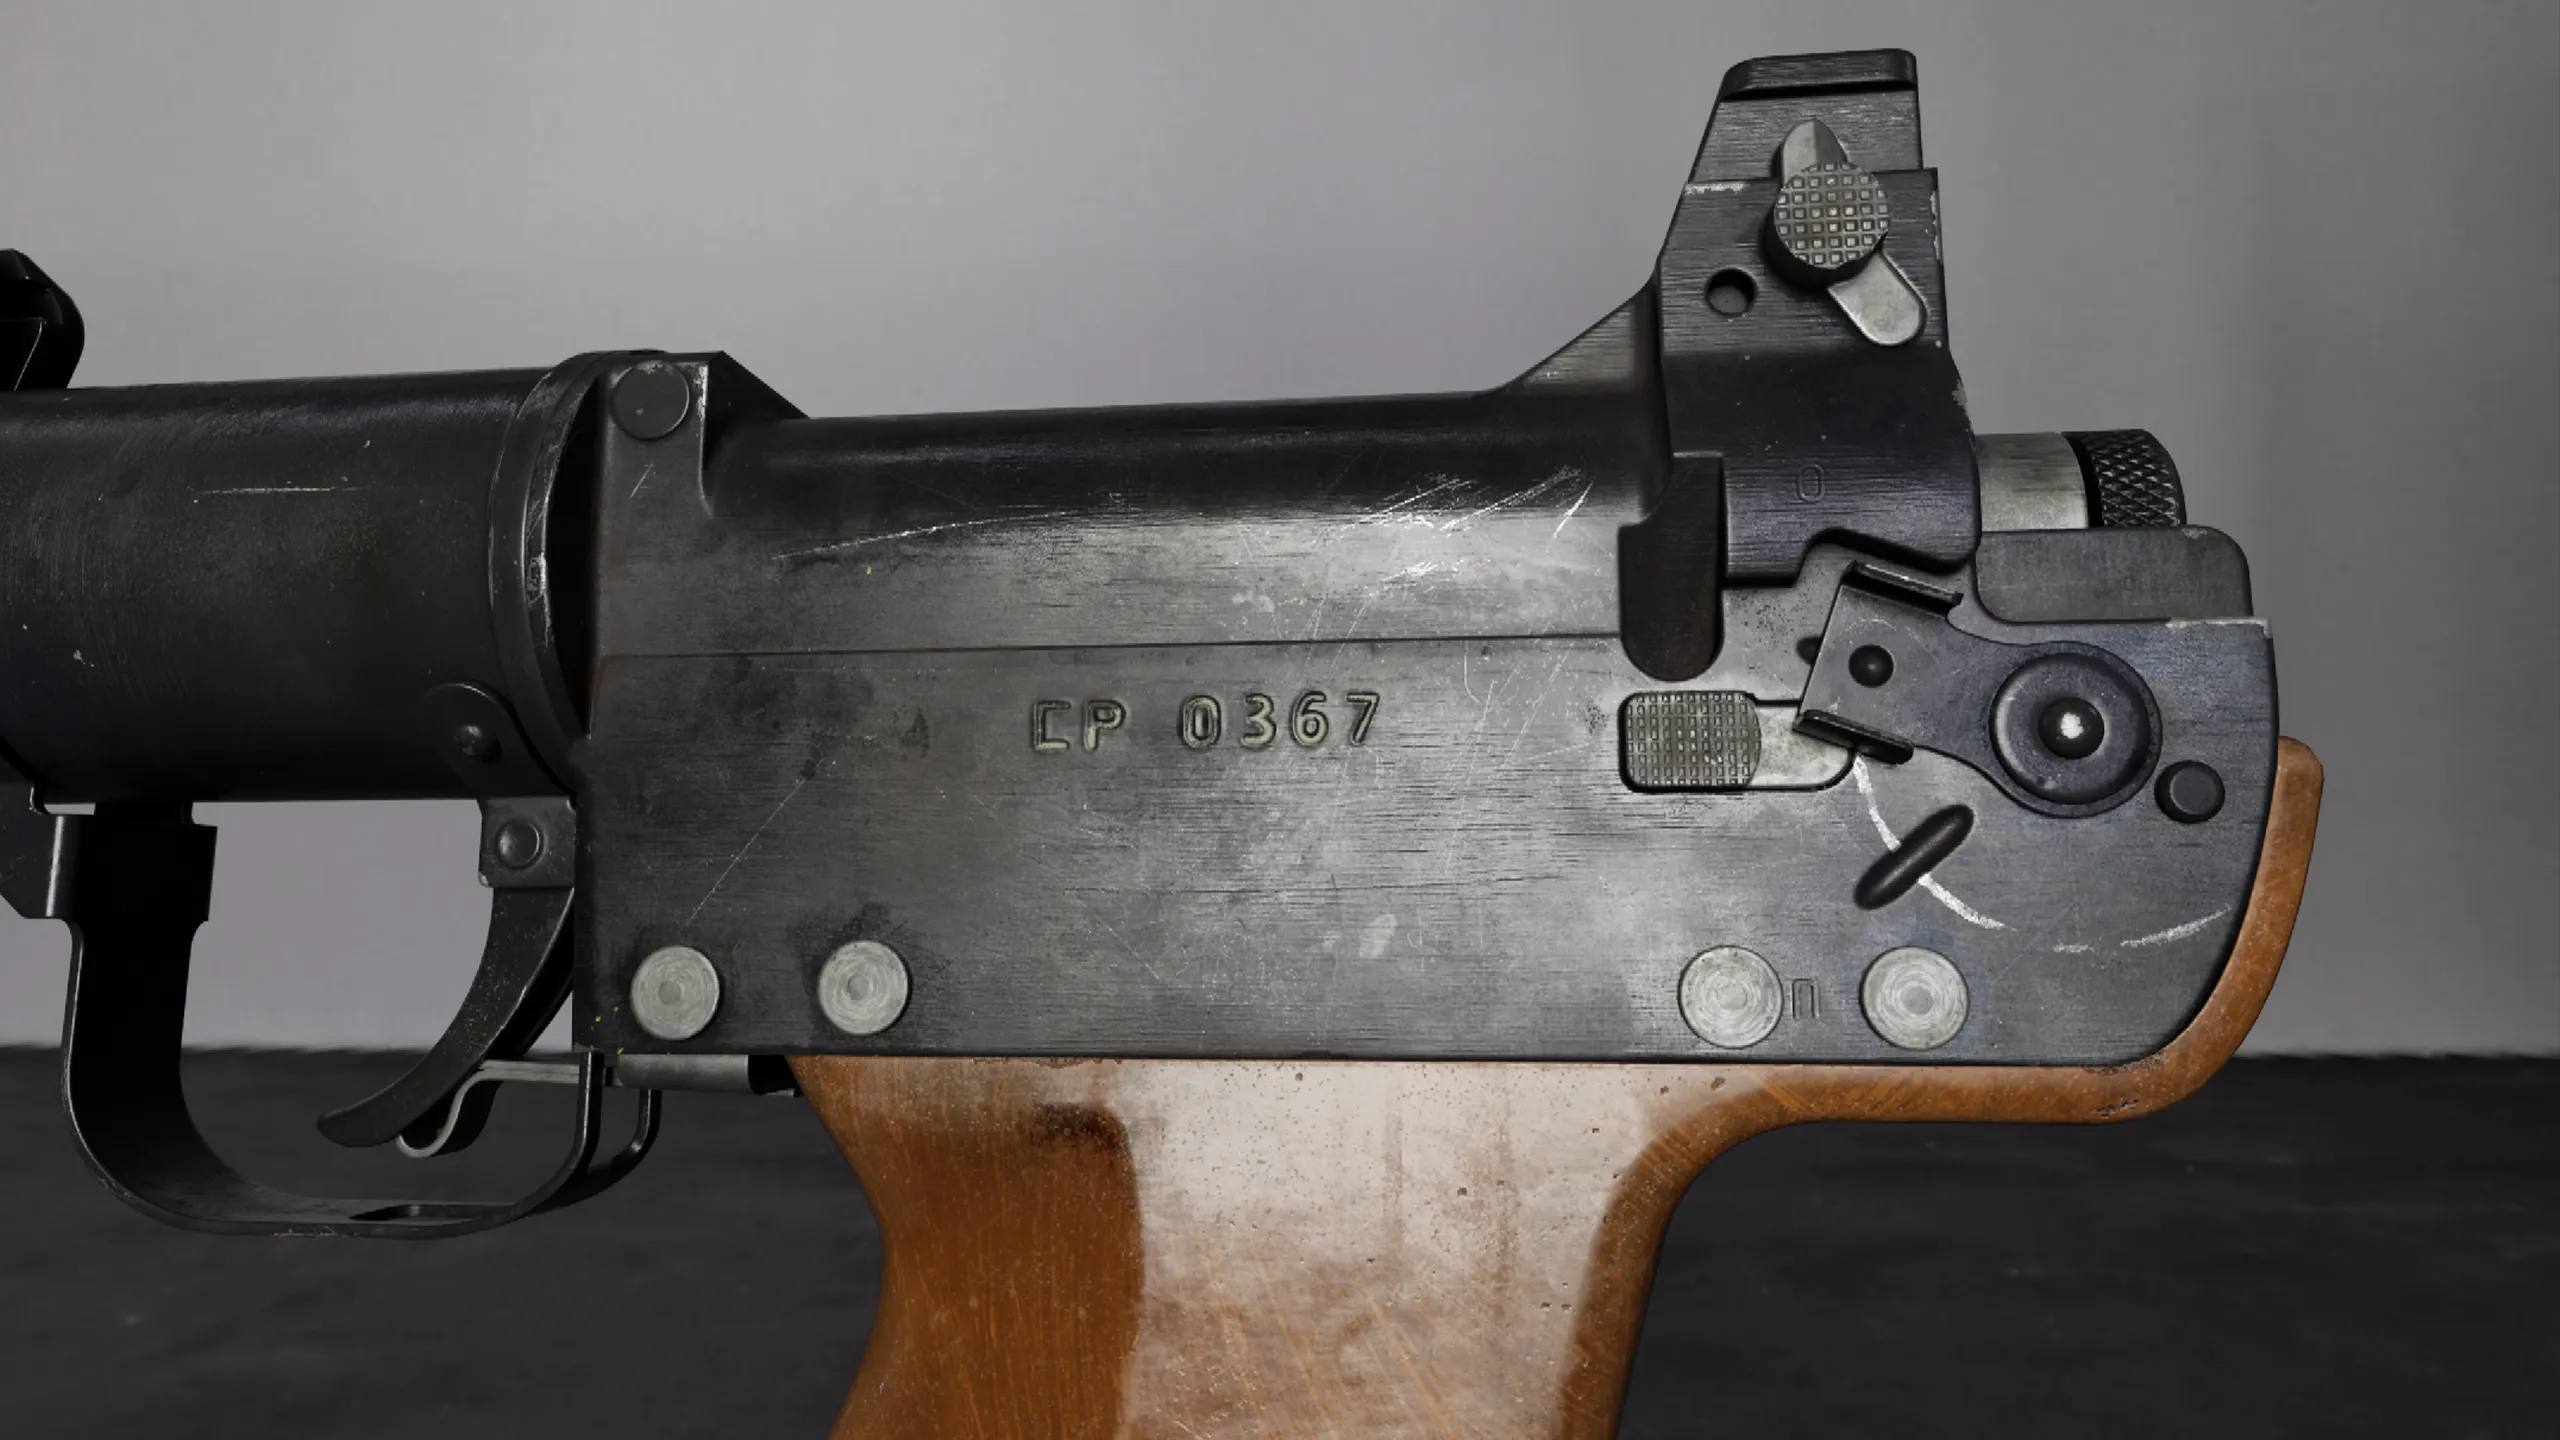
Don’t go overboard. It’s easy to get caught up in texturing and end up with something noisy, messy, and over-grunged. Zoom out every now and then and check whether your textures still read at a distance - and more importantly, whether they read as the materials you intended. Metal should look metallic, plastic should look like plastic.
It’s also worth practicing material breakup: introducing differences between materials that are nominally the same. This makes meshes far more readable when similar parts overlap each other. On my BS-1, for example, the rivets, trigger guard, grenade retention clips, and bayonet lug retention clip are all a different material from the barrel, using subtly different color variation and roughness values. From a distance you can still pick out the individual components.
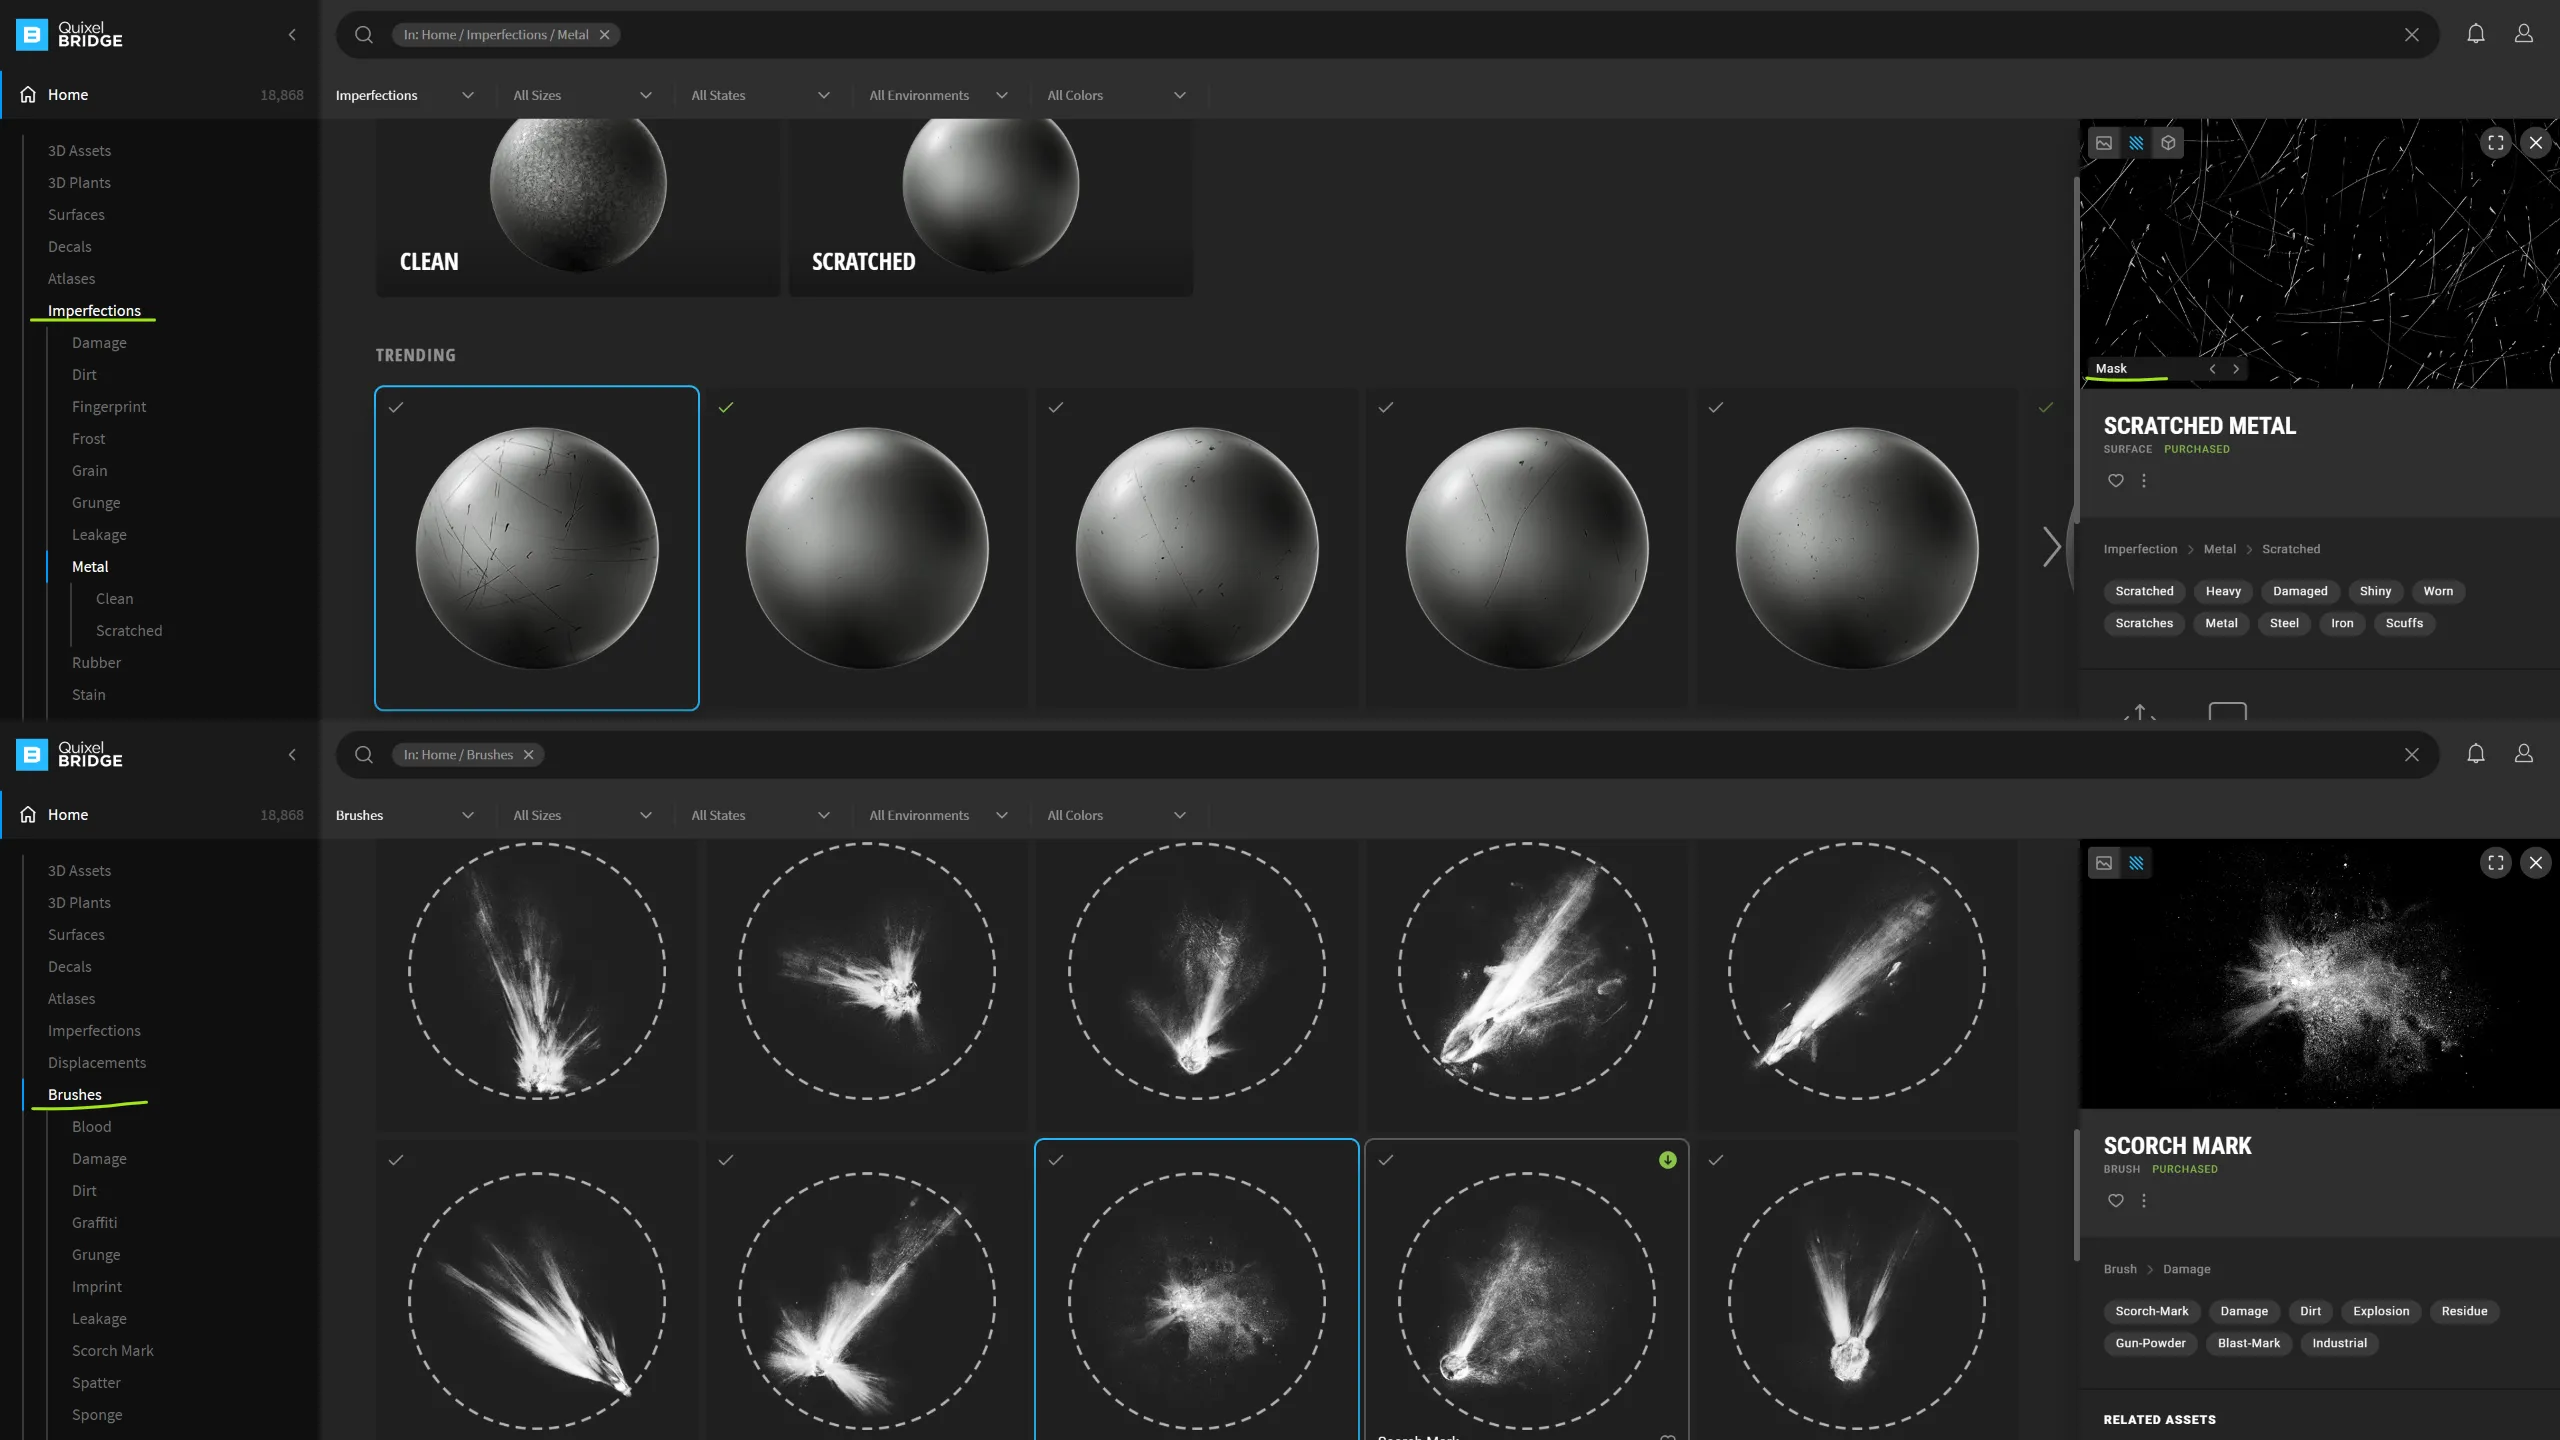
One of the things that pushed my model to first place was the bakelite material on the grip. Here’s how I did it.
Rendering
We’ve technically finished the marathon, but don’t get lazy on the last step. Rendering can make or break your textures, and you don’t want all that work going to waste on an ugly, blurry mess.
This stage is iterative, and the biggest piece of advice I can give is to experiment and get creative with your lighting setup and set dressing. Pinterest, weapon photography, and ArtStation are all great places to pull ideas from.
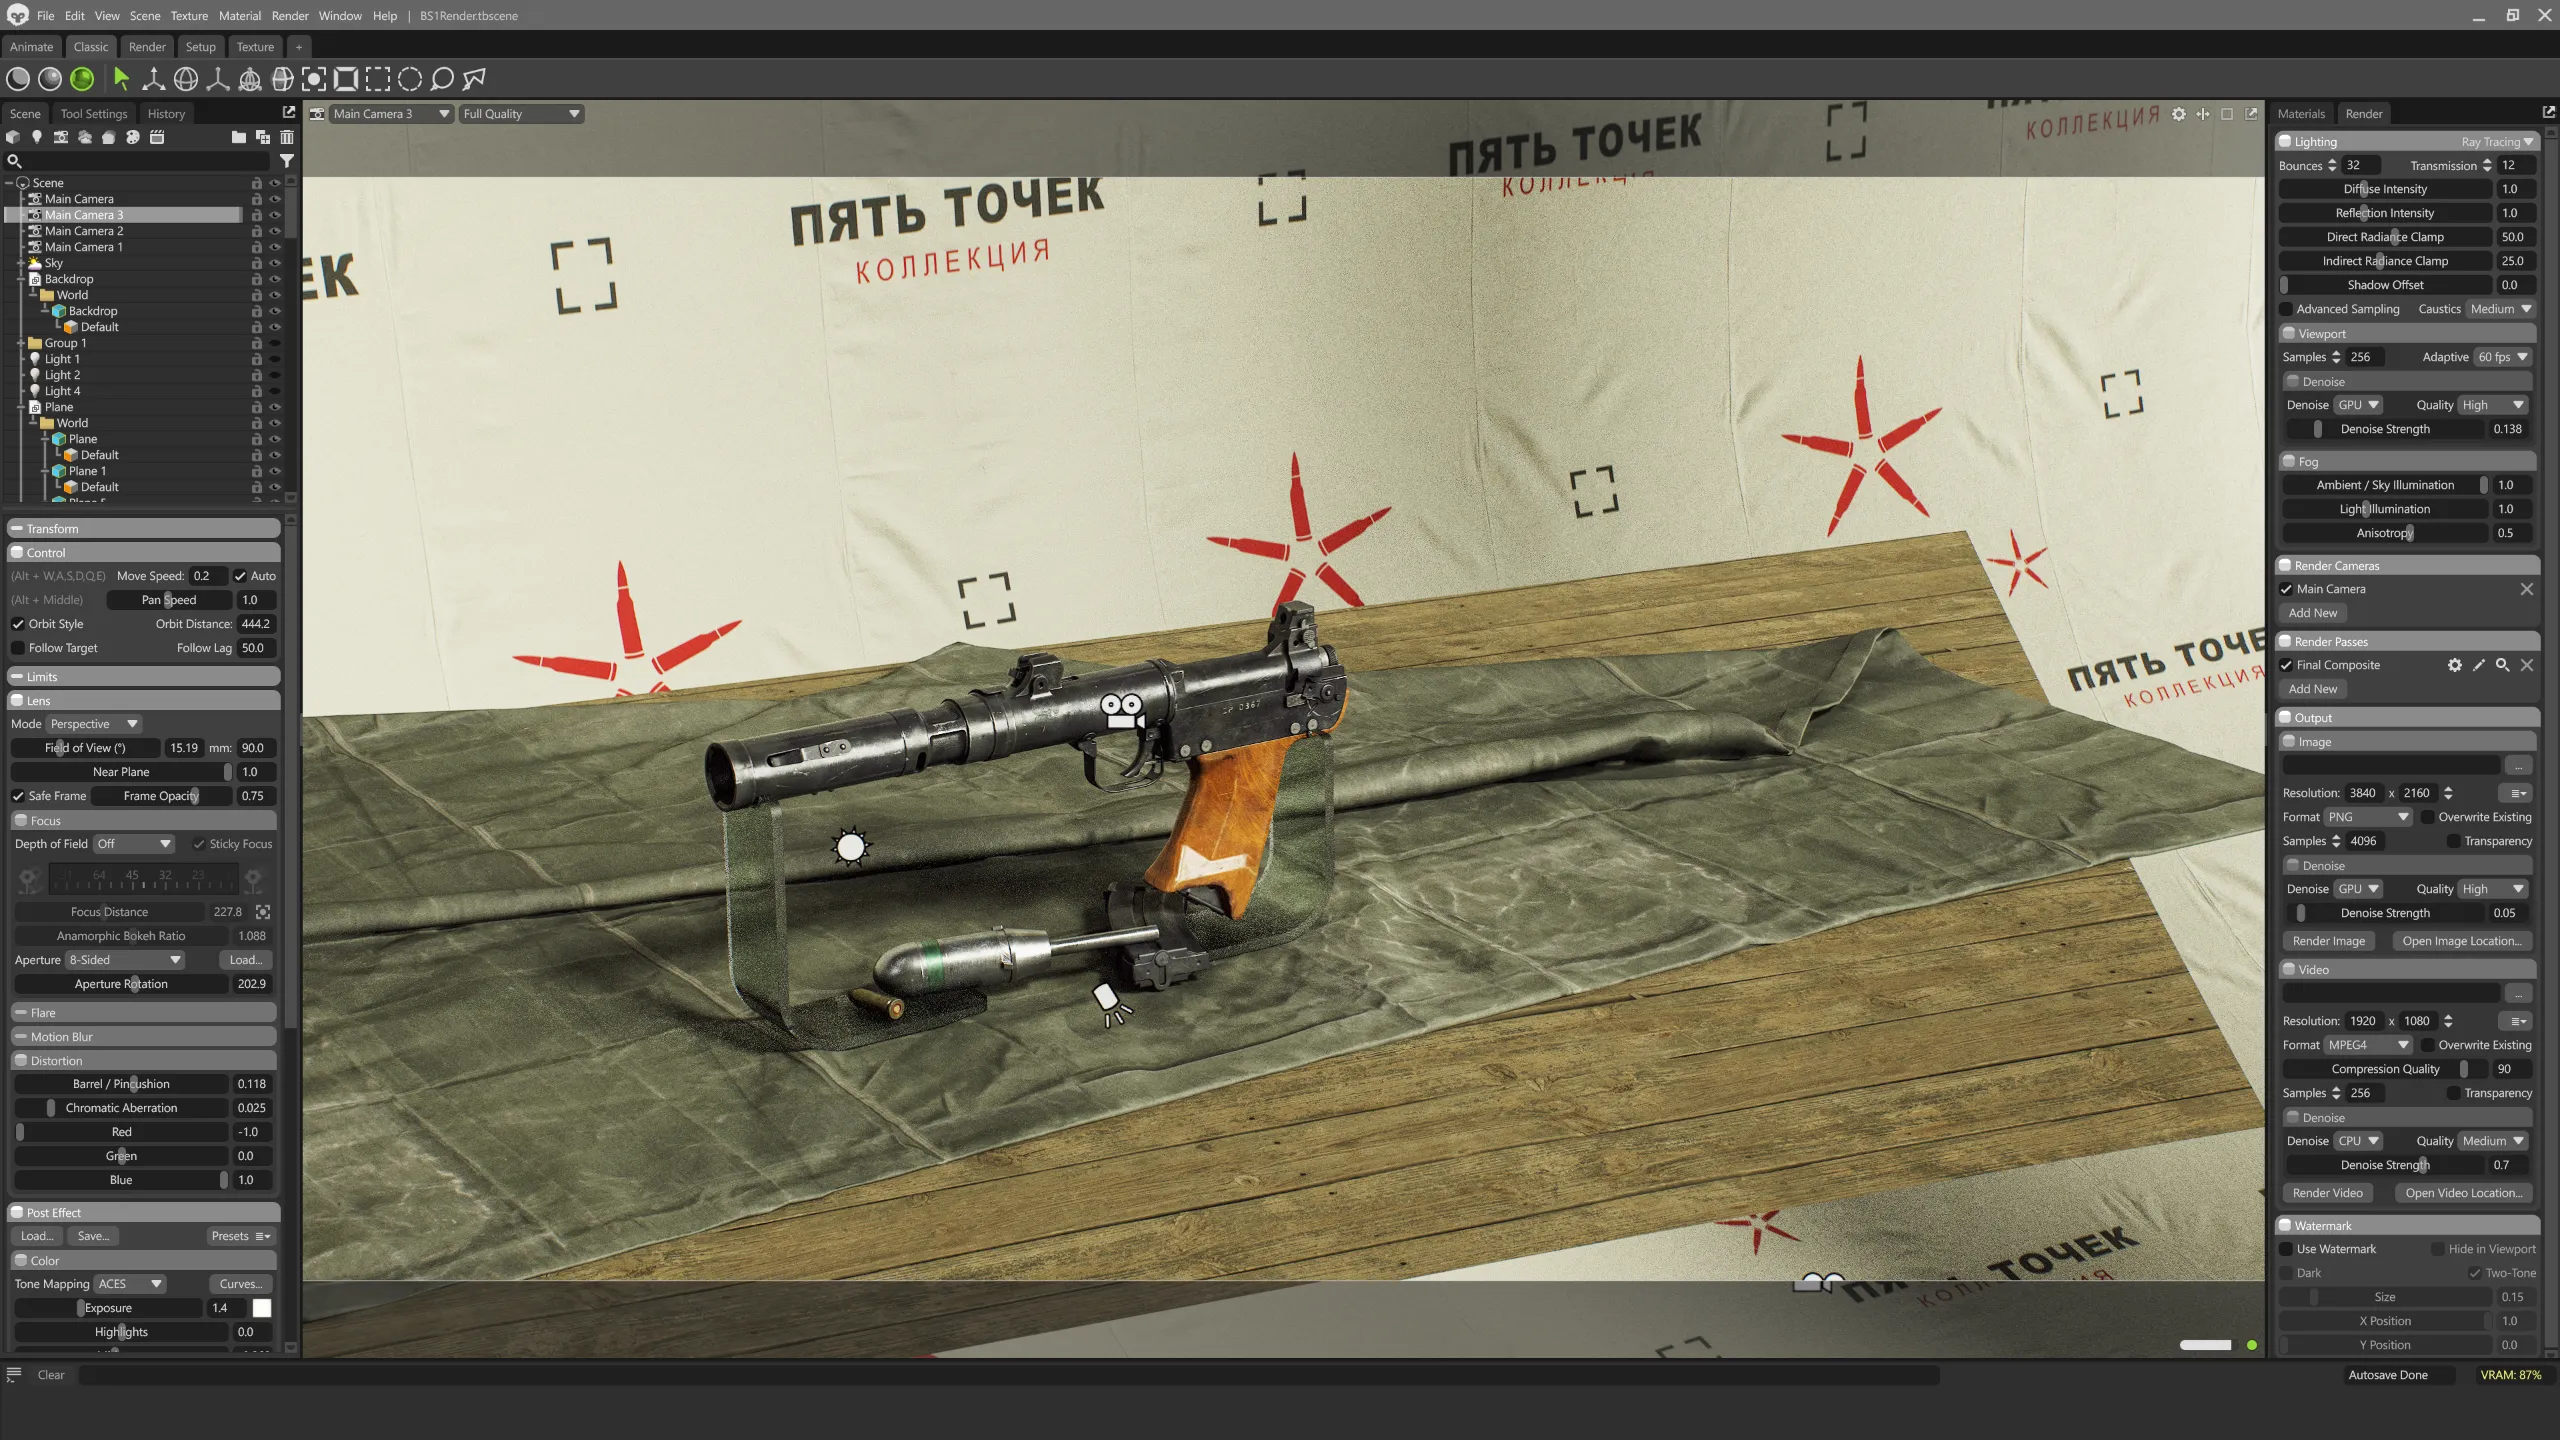
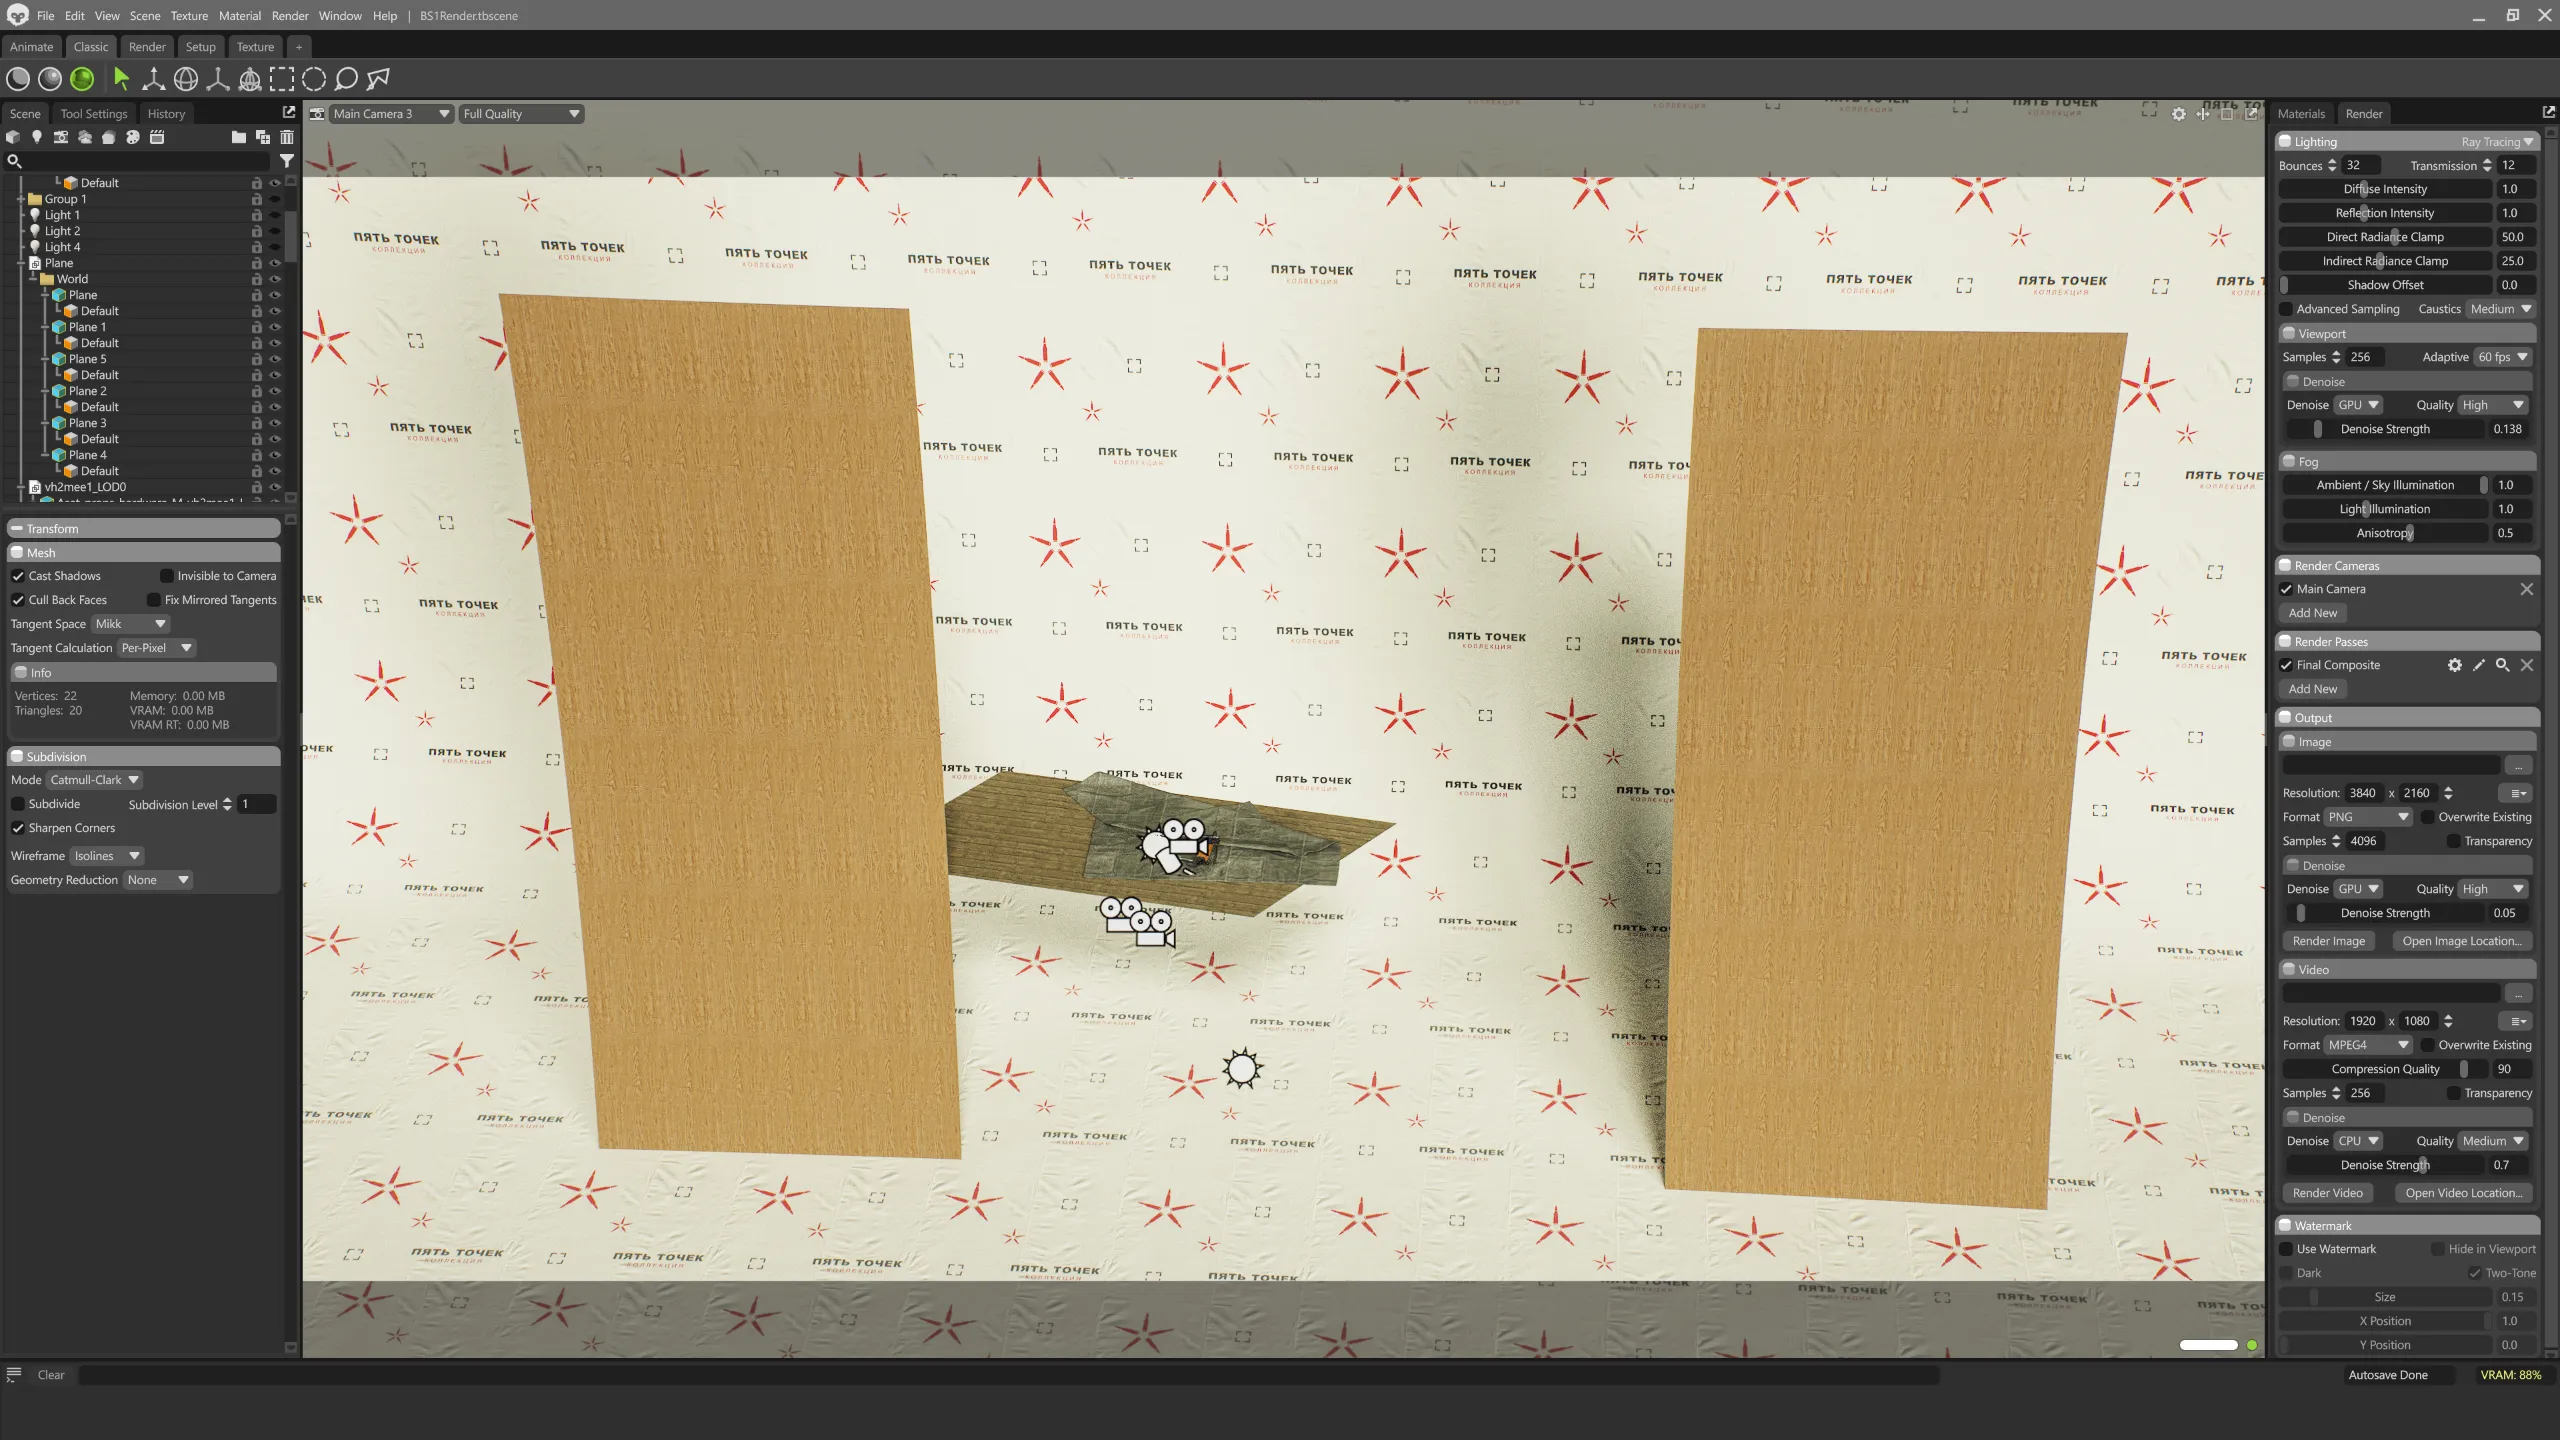
Personally, I find an HDRI is usually enough lighting for most renders. Below are the settings and layout I used for my flagship render. One neat trick I picked up: place large planes to block out some of the light. It breaks up the uniformity of what’s cast onto the background and adds a lot of realism.
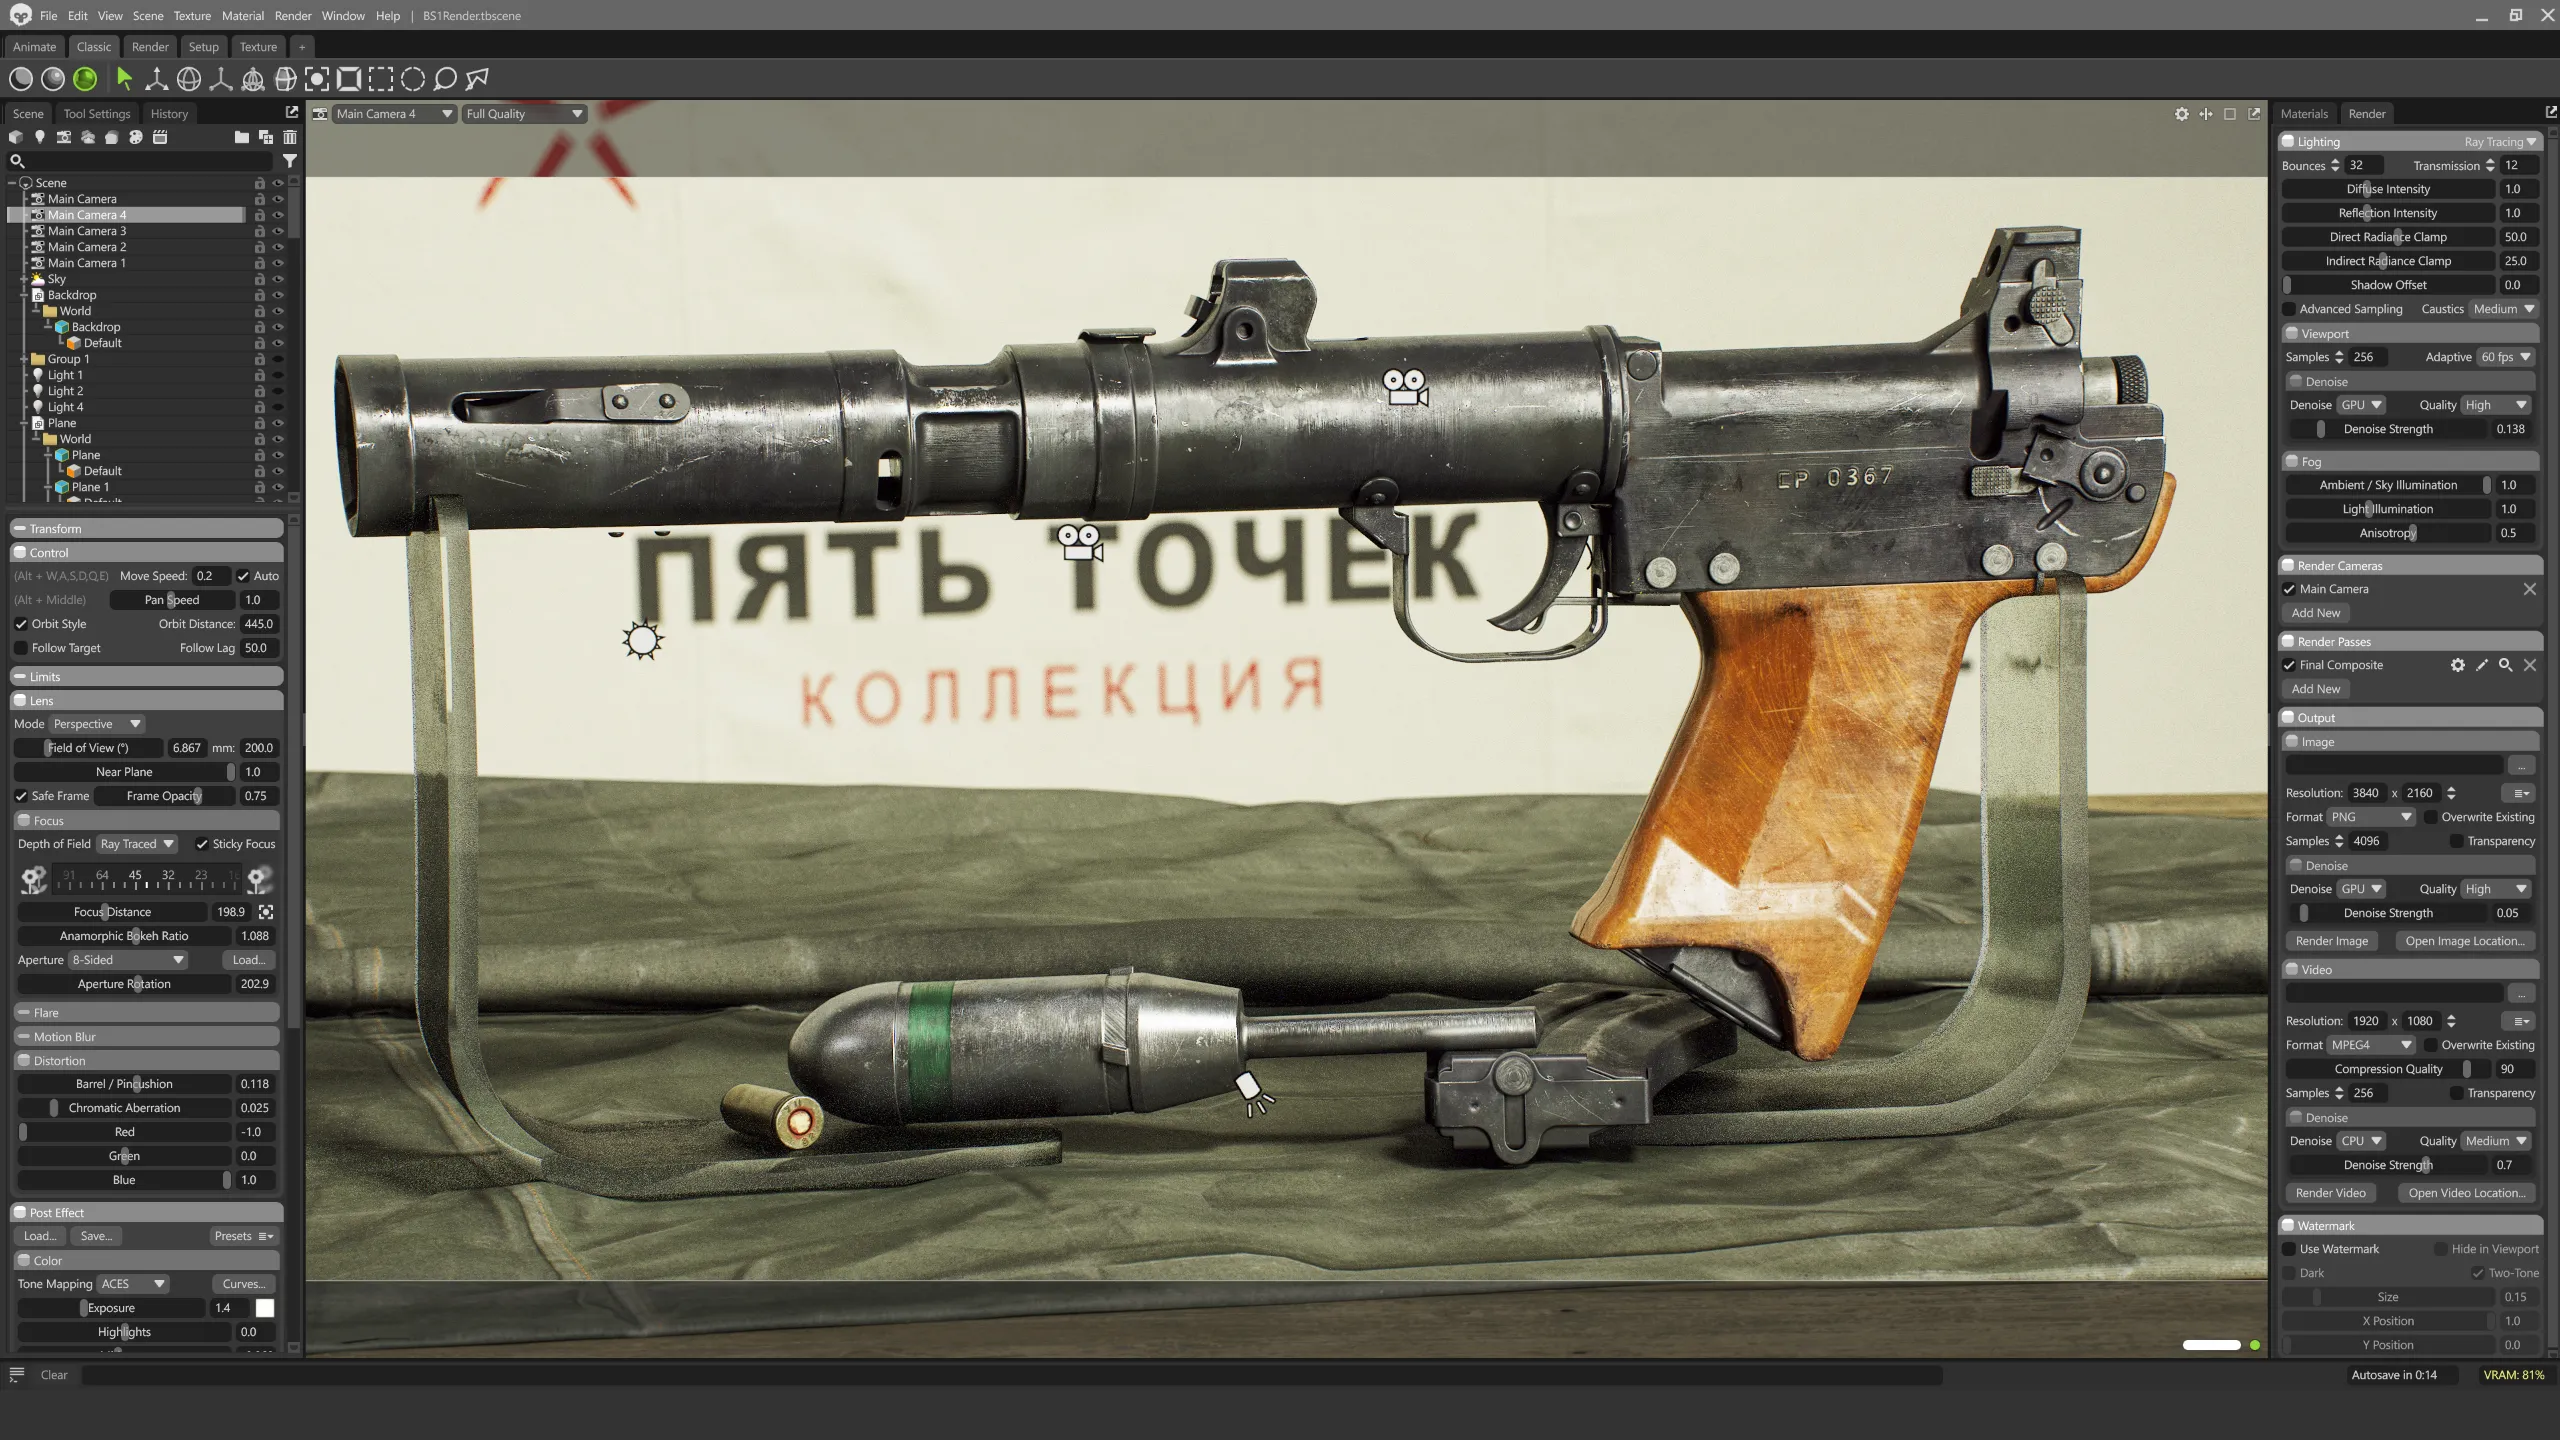
The environment is one half of the render; camera settings are the other. For weapon photography, focal lengths typically range from 90-200mm. Lower focal lengths are for wide shots, higher ones for close-ups. This matters beyond framing, since focal length also determines how depth of field is calculated - get the value wrong and the photo won’t read as real.
 High Focal LengthLow Focal Length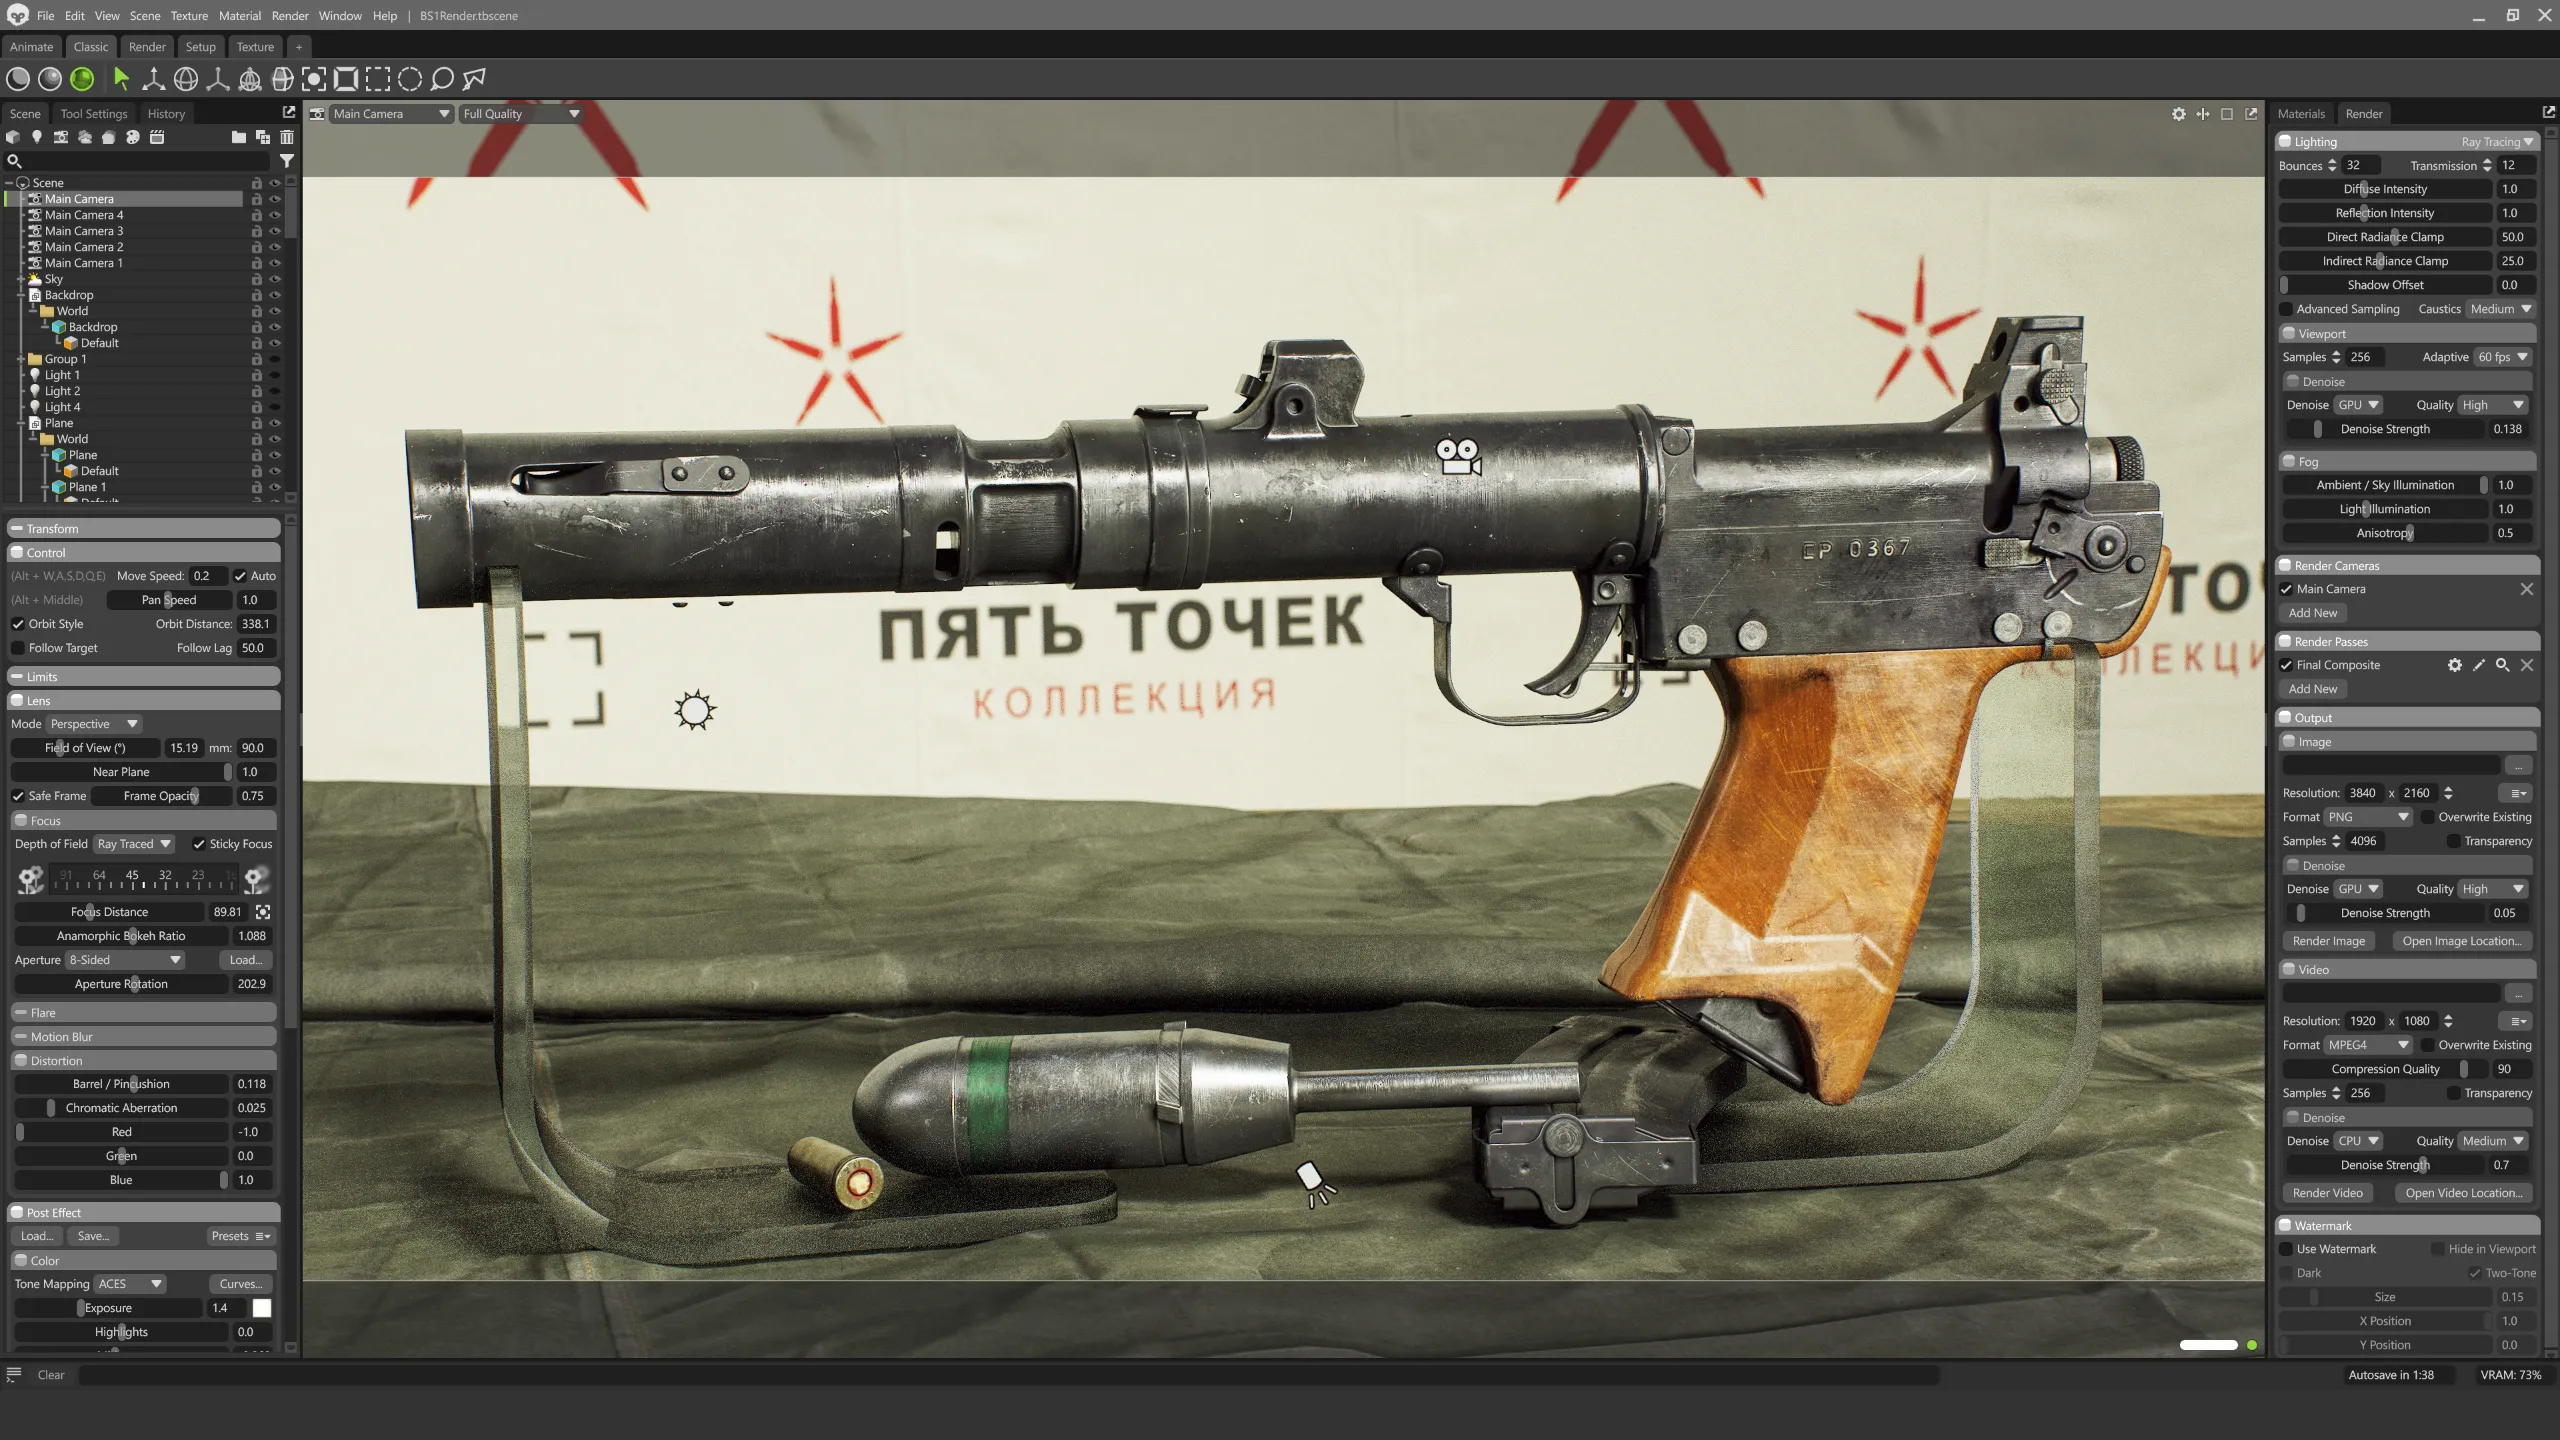
Notice how differently these two come out. With the high focal length, the weapon looks bent and warped and the background is far too zoomed in. This is why matching your focal length to the shot actually matters.
For the rest of the camera settings, I recommend a pincushion distortion value around 0.1 to further simulate lens distortion - keep it subtle. Same goes for chromatic aberration: a little at the edges is good, but push it too far and you’ll ruin the realism.
Color grading is really just an iterative process. Tweak in Marmoset until you land on something that looks good and isn’t too noisy or washed out. Photoshop is great for the final balance - in my experience Auto Tone and Auto Contrast under the Image tab are the two best options.
For ArtStation thumbnails, I’ve had good success with close-up shots that don’t reveal too much or too little. Contrasty images always stand out, so make sure yours is bright and colorful. That’s what grabs attention.
Conclusion
Thanks for making it to the end. I hope you took something useful away from this. I’ve learned a lot over the years modeling, texturing, and experimenting with all sorts of software, and hopefully this saves you some of the technical debugging and obscure problem-solving I had to go through myself. Good luck on your next project.